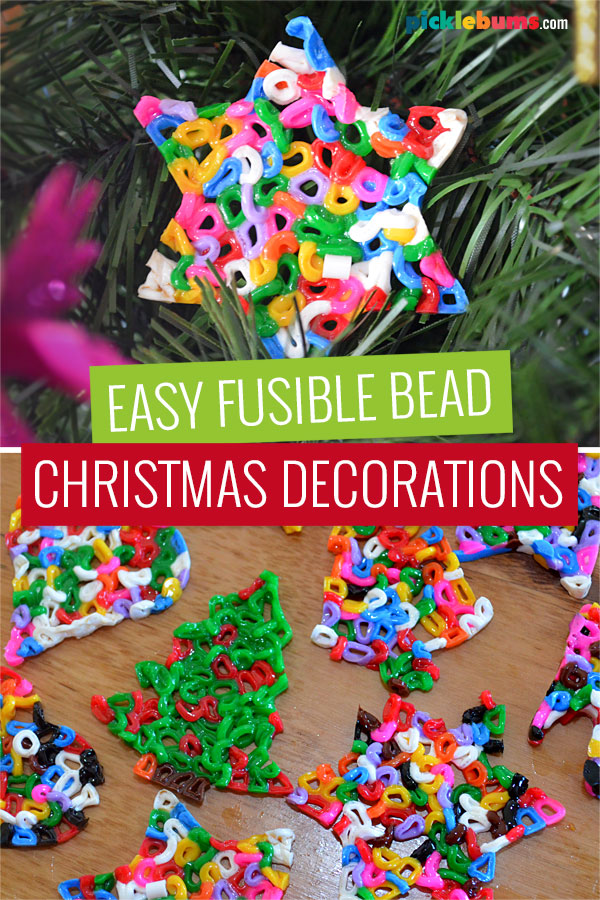
These fusible bead Christmas decorations are fun and easy to make with just Perler beads and cookie cutters!
This post contains affiliate links.
A while back I bought a BIG jar of fusible beads, you know the ones, you might call them Perler beads or Hama beads. My kids love using them to make all kinds of perler bead crafts and creations using them in the traditional way with a base tray and iron, but there are so many fun ways you can use fusible beads.
These easy fusible bead Christmas decorations do away with the base plates and the iron. That makes them quick and easy to make, and a perfect Christmas craft project for younger kids to join in with.
You don’t need to carefully arrange the Perler beads onto the base plates for this fusible bead craft, metal cookie cutters provide the shape for these decorations. So it’s great for little hands who might find the traditional arranging of fusible beads difficult or frustrating.
You also don’t need to iron the beads to get them to stick together. You simply pop them in the oven and watch them melt! It’s so much quicker and easier than ironing each individual creation!
If you love using fusible beads in the traditional way, check out these awesome Christmas Perler bead decorations and ideas.
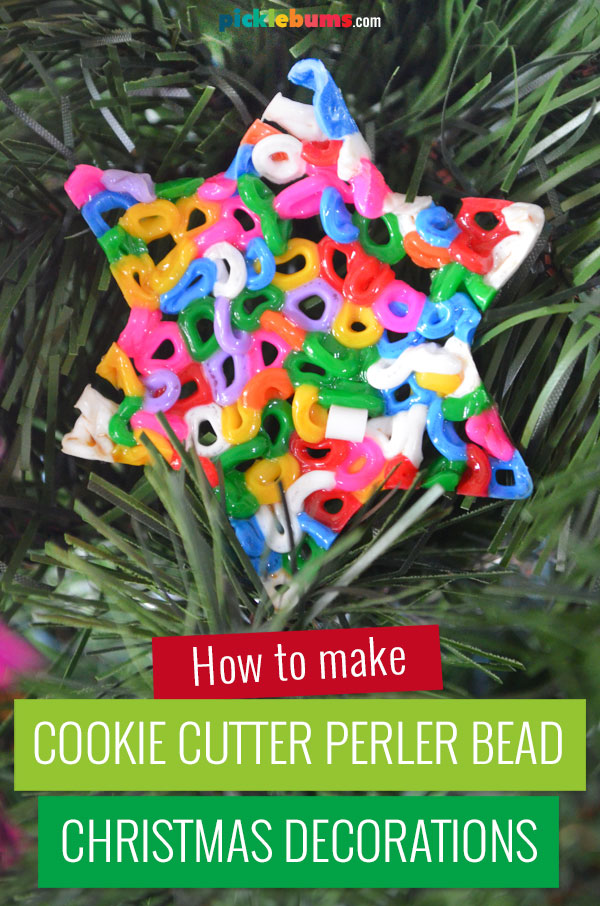
How to Make Fusible Bead Christmas Decorations
If you’ve got some Perler beads of Hama beads, or any kind of fusible beads you only need a few other supplies to make these fun fusible bead Christmas decorations.
- Fusible beads
- Metal cookie cutters
- Baking tray
- Baking paper
- cooking oil

You can use any kind of fusible beads for this craft – Perler beads, Hama beads, or the ones you can buy at Ikea are good too. It’s best to stick with one brand though as each type melt at slightly different rates so mixing them up will not give you as good results.
The cookie cutters need to be oven-safe, so stainless steel ones work best. Look for simple shapes without too many intricate details. Things like a start, Christmas tree, candy cane, heart, or bell work well.
Start by covering a baking tray with non-stick baking paper and place the cookie cutters on the tray.
Coat the inside of the cookie cutters with a little cooking oil. You could use spray oil, or brush on whatever cooking oil you have on hand. Make sure you coat the cookie cutters really well and get into all the little crevices, otherwise the melted beads will stick to the inside and you’ll have a big mess!
Next, pre-heat your oven to around 220 degrees Celsius (approx 425 Fahrenheit).
Now for the fun part! You need to fill each cooking cutter with the fusible beads.

Using a teaspoon, with the cookie cutters sitting flat on the baking tray, spoon in a mixture of coloured beads, making sure you have enough to at least make a single layer of beads, fairly neatly arranged, making sure there are beads filling in all the little nooks and crannies of the shape.
Making one neat layer of beads can be a little tricky for small hands to manage, so don’t worry if you you add more beads to your cookie cutter. As long as there are beads filling all of the shape it will come out fine.
You can also take some extra time and separate the beads into colours, arranging the individual colours exactly where you want them to be inside the cookie cutters, like we did with the Christmas tree. This is quite fiddley, but older kids will enjoy the challenge and the results!.

Be warned, you are going to get little beads going everywhere! That’s ok, just pick up any stray beads off the tray and either pop them in your cookie cutters or back in the bead container so they don’t melt all over the tray.
Now you are ready to carefully put your tray full of ‘bead cookies’ into the hot oven, and watch what happens.

The beads will begin to melt and slump down in the cookie cutters as they fuse together.
If you put a single layer of beads in your cookie then it will only take a few minutes for them to melt and fuse together. If you put in loads of beads it will take a while longer. Ours took around 5 minutes for the thinner ones and up to ten minutes for the thicker decorations. Keep an eye on them as they melt and when they go from nice neat little cylinders to slumped squiggly shapes, you’ll know they are ready.
Once your bead cookies are melted to your satisfaction, carefully take out the tray and using tongs or an oven glove pop your bead cookies into a bowl of warm water. This will cool them off slowly and make it easy to pop them out of the cookie cutters.
Add a string through one of the holes in the decoration and they are ready to hang on your Christmas tree!

If your kids love fusible bead crafts as much as mine do, check out these Perler bead ideas and tips

These look great! We’ve made bowls with our beads from Ikea before, but didn’t think of tree decorations.
What temp did you bake these at? We are definitely trying this! Thank you for the inspiration!!
I had this exact activity on our to-do-list once the school holidays start. Thank you, for the very detailed instructions, it will make it a lot easier than trialling it myself!
This is great! I was just looking the other day for something different to do with the 15,000 or so beads that my SIL gifted my kids one year for Christmas. They’ll love this – thanks so much!
Even as an adult, watching these beads melt is fascinating! I’m featuring this in an ornament round-up at The Crafty Crow soon!
It really was so cool to watch them transform! I really want to melt some pony beads this year, but we haven’t gotten around to it yet!
How long does it take for them to melt? Thinking of doing this as a kid’s craft @ my library but I don’t want to get into a major time-drain! :)
It depends how full you fill your cookie cutters – more than one layer of beads will take longer – and how hot your oven is, as well as how melted you want them. It only took a few minutes – I’d say 5-10 max for ours to melt. Hope that helps. :)
I can’t take them out the cutters anymore ?
Try warming them up a little in the oven again and trying to remove them when they are still a bit warm. Next time make sure you coat the inside really well with oil so they are easier to get out.