
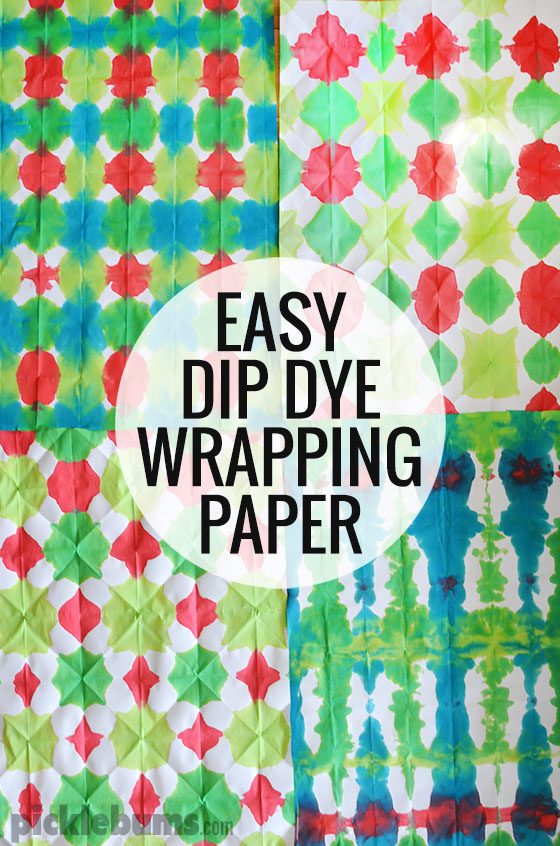
Easy Dip Dyed Wrapping Paper
It was Sunday afternoon. The girls were at a birthday party and the boys were busy crafting at one end of the table, so I set up the iron at the other end of the table.
As I spread out the first sheet of paper ready to iron Noah looked up from his activity and frowned.
“Oh Mum” he said in a condescending tone “that’s not what you use an iron for!”
“Oh really?” I replied, “what do you use an iron for?”
Noah looked confused, “I don’t know” he said “but not for that!”
I laughed as I continued to cut large sheets of paper off the roll and iron them flat. I’m surprised Noah even knows what an iron is, but I’m not surprised he can’t remember what it’s usually used for… I doubt he has seen me use it more than a couple of times in all the five years of his life!
But I got the iron out on Sunday so we could make some super cool, super easy, dip dyed wrapping paper!
Here’s what you’ll need for this cool dip dying activity:
- Large sheets of butchers paper or similar light, un-coated paper (you don’t have to iron yours, but outs came off a roll and it’s much easier to manage if they are flat)
- Containers of liquid water colours or food dye watered down.
- Rubber bands
- A large covered surface
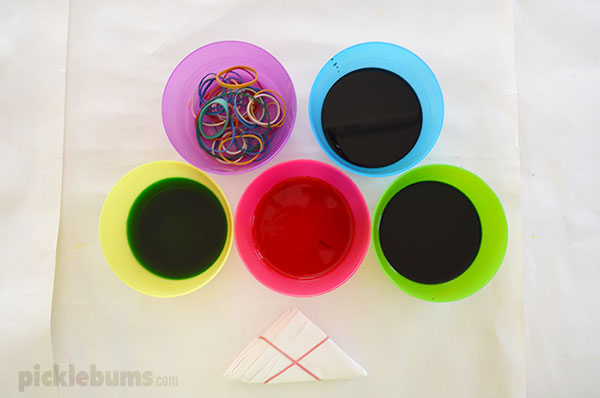
After I’d ironed our sheets of paper flat (they were just too hard to fold when they rolled up on themselves!) I set out four containers of dye – some with liquid water colours in them and some with food colouring, both watered down a little.
We chose Christmassy colours as I’m trying to get ahead with Christmas organisation a bit early and start my stash of wrapping paper! You can choose whatever colours you like, but be aware that the colours will blend where they overlap so pick colours that combine well.
The first thing you need to do is fold your sheet of paper.
You can fold your paper any way you like, just make sure you have lots of layers. The folding technique below is based on traditional dip dying/shibro folds, it’s pretty easy, and it gives great results!
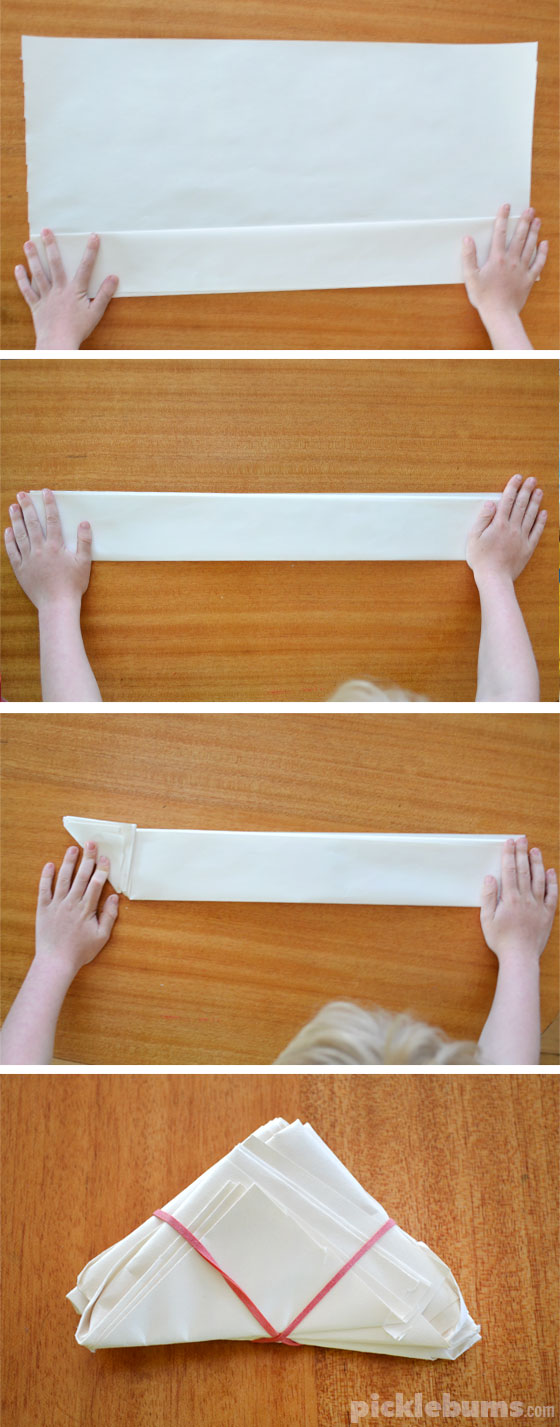
Start by folding your paper in a concertina fold… back and forth till you have folded the whole sheet.
Then, starting at one end, fold the corer up to make a triangle shape and continue like that again in a concertina fashion until you have a small triangle shaped bundle.
Secure you paper bundle with an elastic band to keep it all in place.
You can also fold along the strip into a square or rectangular shape instead of a triangle for slightly different results, or experiment with your own combination and folding designs.
It doesn’t matter if your folds are not perfect, as long as you have lots of folds you’ll get an interesting result.
Once your paper is all folded up it’s time to dip!
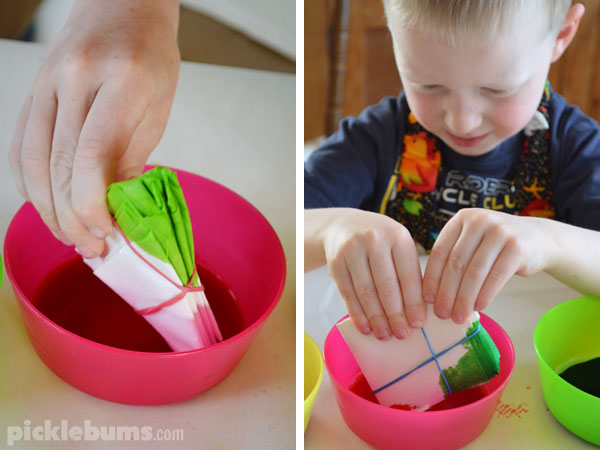
Dip each corner or side of the paper shape into the dye. Let it sit for a moment to soak up some of the colour then turn your paper and dip in the next corer or side.
Now that you’ve dipped and dyed, you need to carefully unfold your paper to see how it looks…
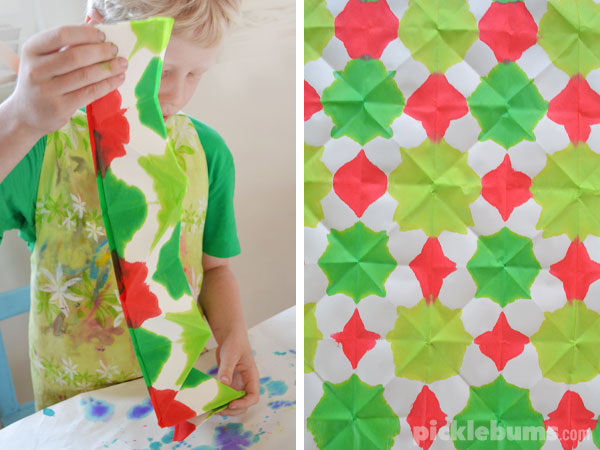
The pattern above was made by using the triangle fold.
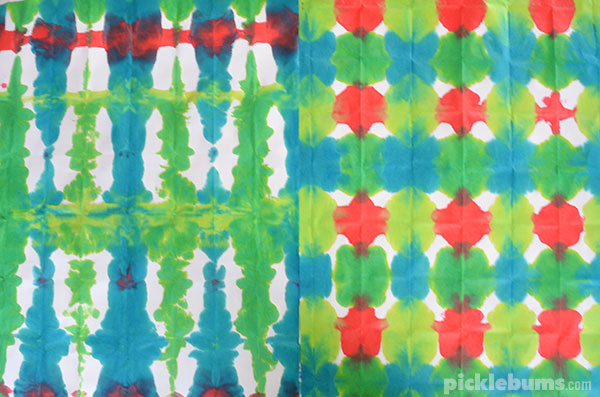
The pattern on the left was made with long rectangle folds, and the pattern on the right was made with square folds.
After I’d blown my kids minds by getting out the iron for the first time in years, and then ironing paper (???) we had loads of fun experimenting with this almost magical art technique.
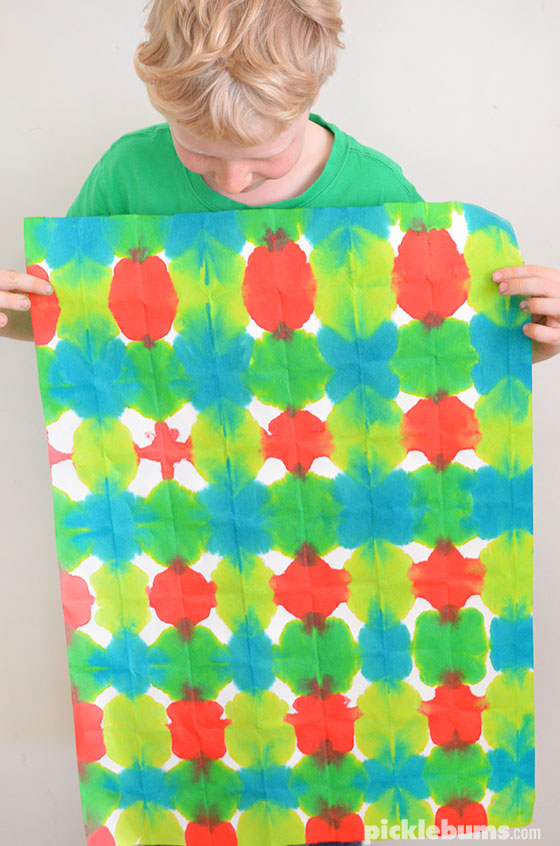
And now I have a pile of fabulous, one of a kind dip dyed wrapping paper… if only I had been organised enough to have bought presents already!
Do you make your own wrapping paper?
What’s your favourite technique?
Love this!! Simple, hands on, BEAUTIFUL!!! Your a genius!:)
Where do you get butcher paper??
We used packing paper that came with Ikea furniture for this project, but you could also use the Ikea roll of paper, or grab some uncoated paper from Amazon like this one – https://amzn.to/4pt77QO (affiliate link)