
Finger Painting For Kids
Finger painting is a great way for kids to learn, explore and create with this fun messy, sensory play!
Try one of our easy finger paint recipes, add some fun finger painting accessories, and check out our tips for containing the mess and making it easy to clean up!

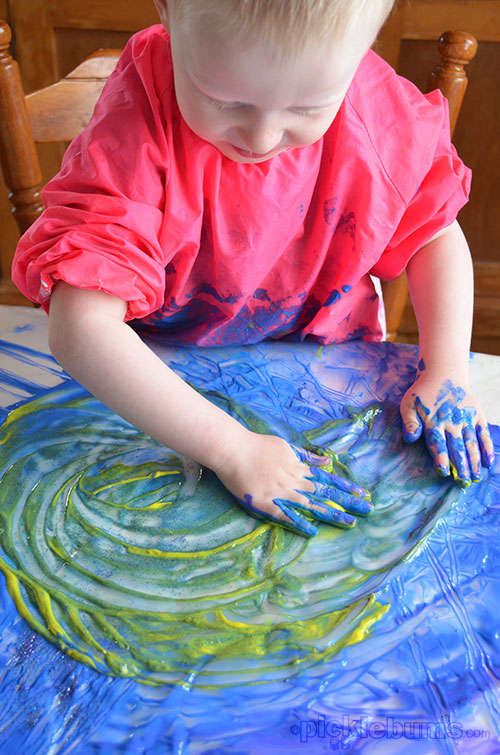
Finger painting is all about squishing, smoooshing, sliding, squelching, wiggling, and slipping around in paint. It’s a sensory experience as well as an art activity, and it is all about the process, the doing, and not so much about the finished product.
Most kids love finger painting, they love to get their hands all slippery with paint, to mix the colours together, to make patterns in the paint, and to ‘rub’ them out and start all over again. Even those kids who might be reluctant to get messy can find joy if given lots of time and space to explore in their own way. It’s worth a little mess for all the joy it brings
Why Finger Painting is Great for Kids!
Finger painting is a great holistic activity for kids that engages and integrates lots of different skills and learning areas, so it’s worth the mess!
Finger painting is a great sensory experience that can be very calming and help kids regulate their emotions.
Finger painting encourages lots of language development as kids and adults use lots of new and interesting words to describe the sensory experience such as ‘squishy’ and ‘slippery’ and ‘slimy’!
It’s also a great physical activity with kids using their whole upper body, arms and hands to move the paint around, as well as using lots of fine motor skills as they make patterns in the paint with fingers and implements.
Finger painting with kids also offers lots of opportunity for scientific thinking, problem solving, and learning as they experiment and explore mixing colours, and making patterns in the paint.
And of course finger painting is a great process art activity that encourages lots of creativity!
Easy Finger Paint Recipes For Kids
There are lots of great finger paint recipes but we use these three simple recipes most often.
Shaving Cream Finger Paint
- Shaving Cream
- Food colouring or paint
Squirt some shaving cream onto your surface, add a few drops of food colouring or children’s paint to the blobs of shaving cream and get the kids to mix in the colour as you paint. Quick, easy and non staining thanks to all the bubbles!
Tip: Make sure your kids are old enough to understand not to wipe their eyes as the shaving cream finger paint can sting. And check for allergies to soap.
Gel Finger Paint
- Cheap clear hair gel
- Food colouring.
Mix several drops of food colouring into the hair gel to make a clear yet vibrantly coloured finger paint with a really interesting texture.
Tip: This recipe is best for making small amounts for a single child. It’s also great in a snap lock bag, taped closed, for a no-mess finger painting option.
Corn Flour Finger Paint
- 1 part corn flour – 1/3 cup
- 3 parts hot water – 1 cup
- Food colouring or paint
In a saucepan, mix the cornflour with a little cold water to form a paste. Then add the hot water a little at a time, stirring vigorously to get rid of any lumps. Once all the water has been added cook the paste, stirring continuously, over a medium heat until it thickens and becomes opaque. Add a several drops of food colouring or a dollop of children’s paint and mix well. Add a squirt of hand soap to make this finger paint even easier to clean up.
Tip: This is our favourite finger paint recipe as is doesn’t cost much to make a big batch in lots of colours, and it makes great finger paint prints. If you use food colouring and leave out the soap this is a safe edible options for little finger painters.
You can also use commercially made finger paint. I suggest testing how washable it is before you start, and adding a splosh of hand soap to it as it makes it nice and slippery to play with and much easier to clean up.
Finger Painting Supplies
To do some finger painting with kids you’ll need:
- finger paint – put each colour in it’s own container with a spoon
- a water proof smock, apron, or old clothes that can get dirty
- a flat surface that is easy to clean
- a tub of water and a cloth for easy clean up
- some paper for taking prints (optional)
- optional finger painting accessories.
How to do Finger Painting With Kids.
Before you start, explain to your kids to keep the paint in the designated area, and show them how to clean their hands in the tub of water if they need too.
Start with a clean surface and letting the kids put a spoonful of their chosen colour on the table, then let them explore any way they want to!
Show the kids how they can make patterns in the flinger paint, and then wipe it away and start again.
If you want to take a print of your finger painting, press a large sheet of paper down onto the painted surface, then carefully lift it up to reveal your finger paint print.
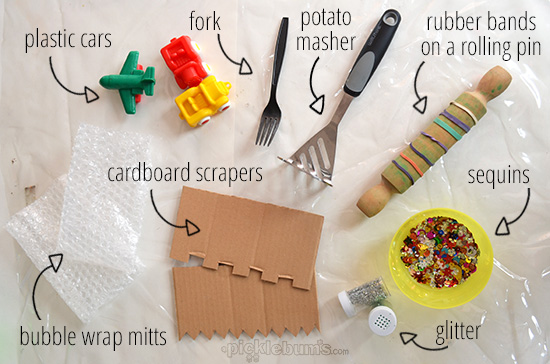
Finger Painting Materials
If you want to add some fun accessories to your finger painting activity, here are some fun ideas:
Cardboard Scrapers
Cut zig zags or castle tops into some pieces of cardboard to drag across your finger paint making lines and patterns and squiggles!

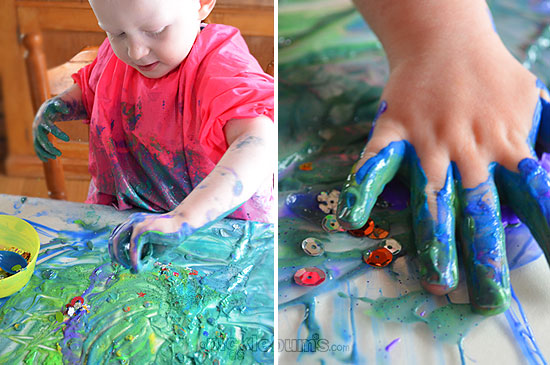
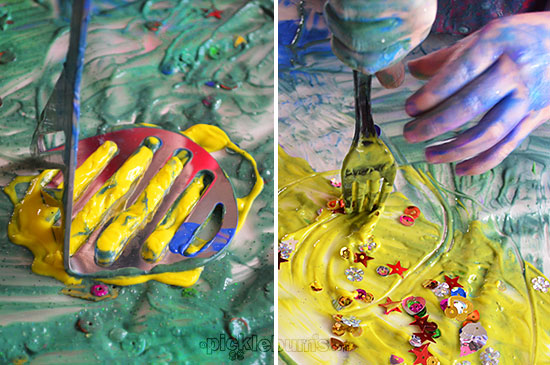
Sequins and Glitter
Offer some sequins in a container and some glitter in shakers to add some colour, sparkle, and interesting texture to the finger paint. You could also add sand or salt for more interesting textures.
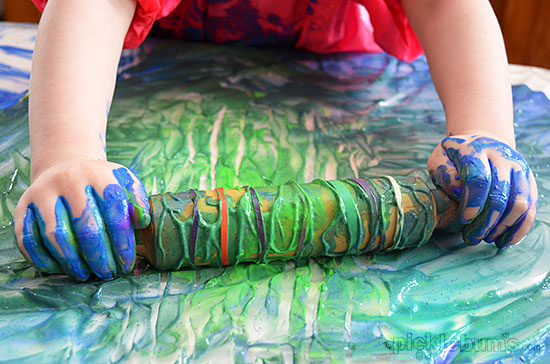
Rubber Bands on a Rolling Pin
Find some rubber bands that fit securely over your rolling pin, then you can roll patterns into the finger paint. Be warned, the colour in the finger paint will almost certainly stain wooden rolling pins, but I think it looks kinda pretty to have a multi coloured rolling pin!
Kitchen Utensils
Try out any kitchen utensils you can find that will stamp or scrape interesting patterns into the paint. We used a potato masher and a simple plastic fork.
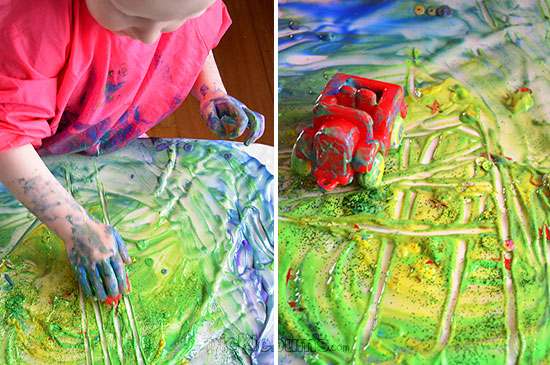
Plastic Cars
We collected some plastic cars (and a plane) to drive through the paint. The different wheels made different patterns in the paint and it was lots of fun zooming them around. Go for plastic over metal cars if you can as they are easier to clean up.
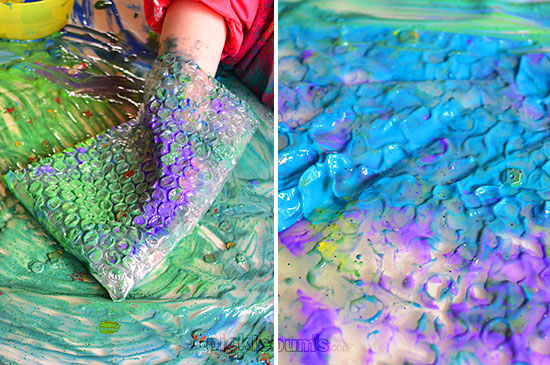
Bubble Wrap
We made bubble wrap mitts by folding ectangles of bubble wrap in half and tapping around two sides to make a pocket. You can slide your hand into the bubble wrap and swish, smoosh, and print with abandon.
Finger Painting Tips
While finger painting can be messy, these tips will help keep the mess contained and give you some more ideas for how to extend a finger painting activity.
- Find a large, flat surface to finger paint on so children have lots of room to move. Covering the surface with a big sheet of plastic makes for easy clean up at the end of the activity – just take the plastic outside and hose it down!
- You could also use a large plastic tray or tuff tray as a way to define the painting area and help keep the mess contained.
- For little ones the tray of the high chair is a great place to finger paint, it keeps little painted hands contained and is easy to clean – just be sure to check that the finger paint won’t stain it!
- A squirt of hand soap into your finger paint will make it easier to wash hands and surfaces.
- Be sure to talk about what your children are doing, this is a great time to use lots of interesting descriptive language.
- Try turning on some music and encouraging your kids to paint they way the music makes them feel.
- For kids who don’t like to get their hands messy, offer then a glove to wear, try putting a sheet of plastic over the paint, or offer them a q-tip/cotton bud to use to make marks in the paint.
More Sensory Activities
If your kids love messy, arty, sensory activities, they might like these:

Try one of these bubble wrap sensory play ideas.

Have a go at this painting on ice activity!
We love finger painting but haven’t done it with all the great accessories you suggest! A very inspiring post Kate with fabulous photographs. :)
You can make your own shaving cream substitute for pennies by whipping the heck out of some dish soap with a little bit of water in a bowl. We have used it in sensory bins and I bet it work well for this too!
… what FUN! love the images and the freedom :-)
We haven’t finger painted in awhile! Your recipes have inspired me to paint this summer.
I’ve also made finger paint using cool whip and a packet of jello. It’s completely edible and actually pretty tasty! Just mix the jello powder in with the cool whip until you get the color you want. It does take forever to dry, but it’d a fun sensory snack! :-)
Love this!! I see finger painting in our near future :) Thank you!!