
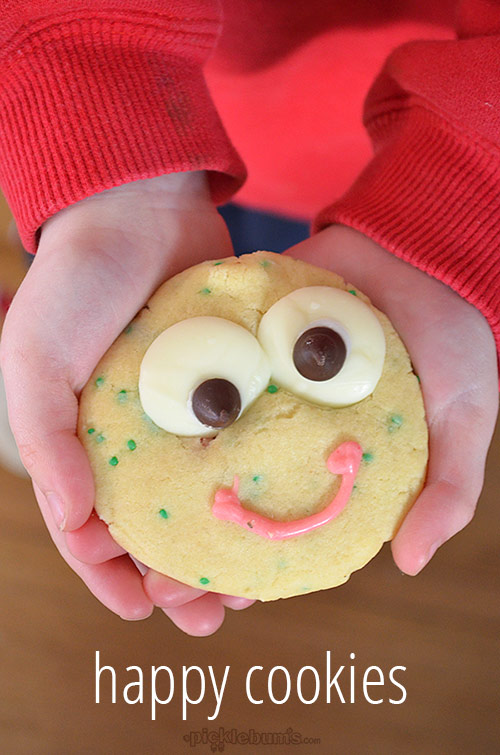
Happy Face Cookies
Birthday week happens twice a year in our house. Once in November when our twins have their birthday, and once in June when the boys have back to back birthdays. So twice a year I go a bit nuts and attempt to bake a jillion (that means a whole lot) birthday treats for school and preschool.
This year we went with birthday cookies!
I’m loving the birthday cookie, they are easy to transport, easy to eat without mess, and easy to make in large quantities. You can even make the dough ahead of time and freeze it, then all you need to do is bake on the day.
Noah requested ‘happy face cookies’ for his birthday treat and this is what we came up with – A simple choc chip cookies, stuffed with extras, with funny eyes and a smiley mouth!
They turned out really well, and made everyone smile, plus they are really simple to make.
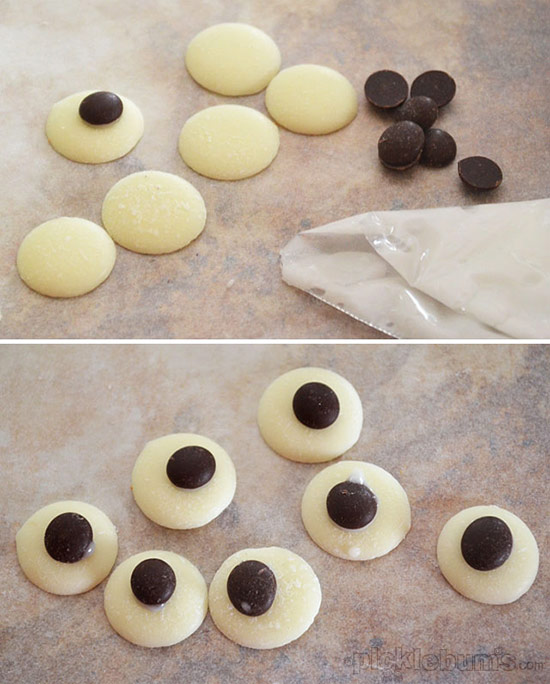
To make the ‘eyeballs’ you just need some big white chocolate melts/buttons, some small choc chips and a bit of plain icing to glue the two together.
We used the same technique to make these monster rice bubble treats for Kidspot last year.
Because the cookies are not sticky like the rice bubble treats I needed a simple way to attach the eyes to the cookies. Instead of messing around with more icing, I decided to just poke two eyeballs into the top of the cookies when they had just come out of the oven and hope for the best. It worked a treat! The warm cookies melted the back of the eyeballs, sticking them to the cookies.
Once the cookies were cool and the eyeballs well and truly set in place, I added some colouring to melted white chocolate and piped a smiley mouth onto each cookie… and there you have it, happy cookies!
Here’s the recipe for Happy Face Cookies.
- 185 grams of softened butter
- 3/4 of a cup of brown sugar
- 1/4 of a cup of sugar
- 1 egg
- 1 tsp. vanilla extract
- 2 cups of self raising flour
- (or 2 cups of plain flour plus 4 tsp baking powder)
- 2 tsp corn flour
- 1/2 cup of chocolate chips
- 1/2 cup chocolate buttons/smarties/MnMs
- 2 tbsp sprinkles or 100s and 100s
- 50 white chocolate melts or large buttons
- 50 small choc chips
- A small amount of icing (icing sugar and water) in a piping bag
- Some extra white chocolate melts for the mouths
- Red food colouring
- Make your eyeballs – Mix up a little icing sugar and water and pop it into a piping bag or a snap lock bag with the corner cut off. Use the icing to ‘glue’ a small choc chip onto a larger white chocolate melt. Set aside until set.
- Pre-heat your oven to 180 degrees.
- Cream butter and sugar, then add the egg and vanilla and mix well.
- Fold in flour and corn flour and then stir through the chocolate chips, choc buttons and sprinkles.
- Roll table spoons of dough into balls and then flatten on to well greased trays and cook for 7-10 minutes.
- Do not over cook! The cookies will not brown, they stay very blonde. When you see them starting to go slightly brown around the edges, take them out, or they will be crumbly not chewy.
- When you take the cookies out of the oven immediately press two eyeballs into each cookie while they are still very warm. Set them aside to cool and set.
- When they are completely cool melt a few white chocolate melts and add some red food colouring. Pop the melted chocolate into a piping bag and pipe smiley mouths onto each cookie
What a fun activity! And they look delicious too:)
Definitely going to be doing these with my kids this weekend!
-Victoria
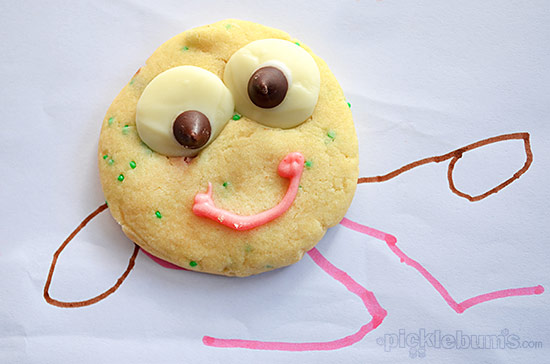
Oh these are just adorable. I can imagine they’d be fabulous at a birthday party and great to give out to kids at school. Very cute. Love the drawing too.