These free printable roads are a super fun addition to your kids car play.
What is about cars that kids love?
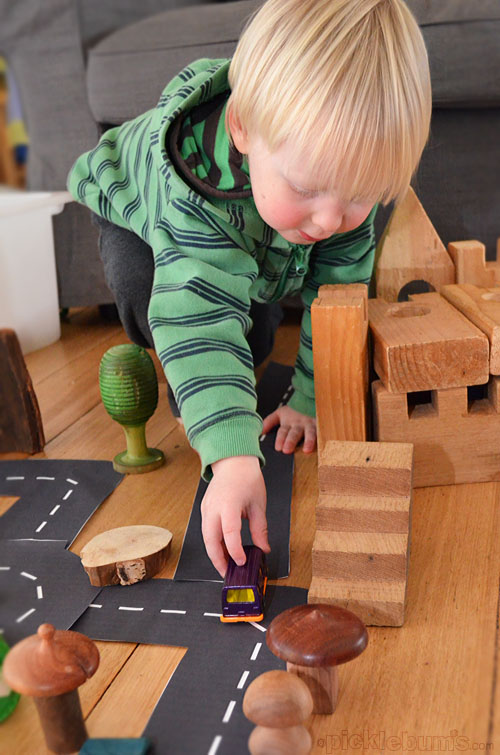
All of my kids loved playing with cars when they were little, and even now they are getting bigger they still love getting the cars and blocks out and building a city. And the toddler that we look after once a week asks to get the cars out every single time. All he wants to do is drive vehicles over every available surface, crash them into each other, and build ‘sheds’ for them to live in.
There is just something awesome about toy cars.
We have a lovely set of wooden roads that match our train set, but we just don’t have enough of them. The road stops too soon and there is not enough corners or crossroads. We needed to get some more, so I made some printable roads to add to the collection
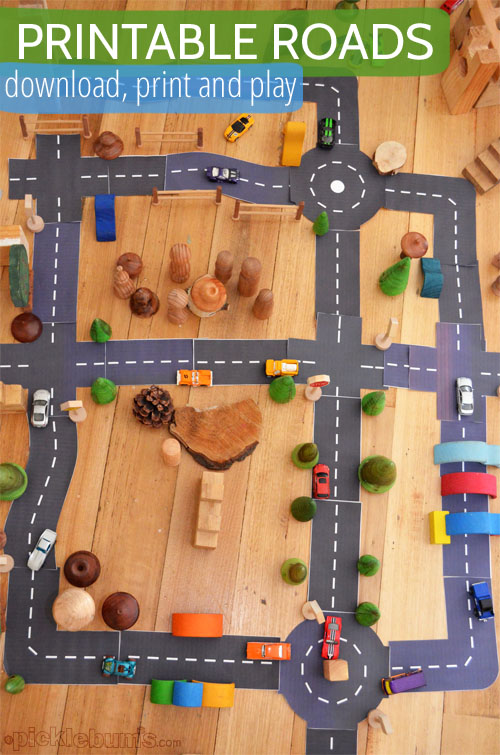
All we need to do is print them.
Free Printable Roads for Imaginative Play
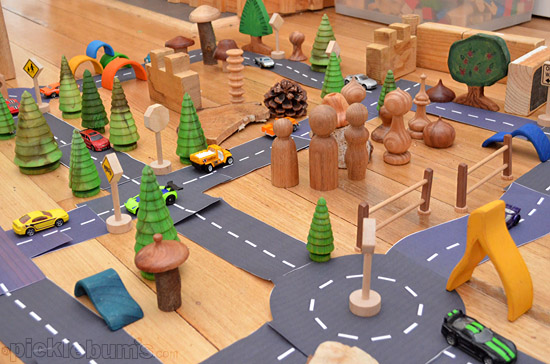
We printed out two sets of roads to begin with so that we’d have enough to make a small town. Then we just printed out extras of each road shape when we needed to make our road turn a certain way, or reach a little further.
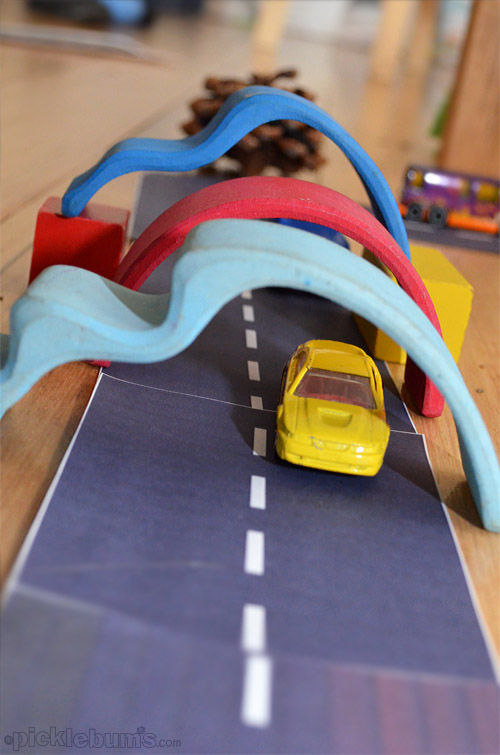
We added trees, wooden blocks, wooden road signs and of course some cars. Then our roads quickly became a town with a parking lot, a tunnel and, of course, a shed!
You could also add animals, people figurines, natural materials such as rocks and leaves, different types of construction sets and all kinds of fun and interesting loose parts. Your roads could become part of a city, or even the runway of an airport!
Make some Printable Roads
You can print them onto regular printer paper, or onto some card stock. They do take a lot of ink to print, but if you laminate them they should last for a long time.
Because we were in a hurry to play with them, I just printed them on plain paper, cut them out and we got busy playing. They sat quite flat on the floor, but we also used a little tape to keep them in place when they wouldn’t stay still.
Later I laminated three sets of roads, so they would last longer and be easier for little hands to manage. Hopefully they will withstand lots and lots of car play!
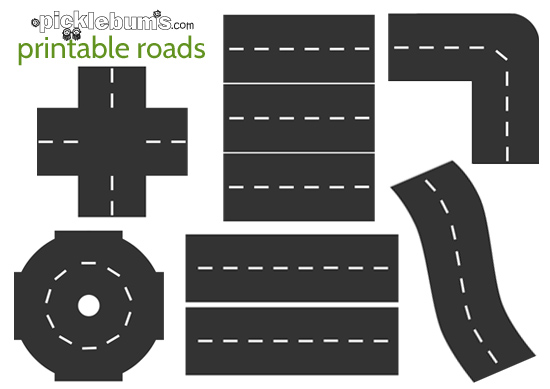
You can download the printable roads here.
This printable is an A4 sized pdf file, you will need a pdf reader such as adobe acrobat to open it. If you are printing on US ‘letter sized’ paper be sure to select ‘fit’ or ‘shrink to fit’ from your printer options.
Please remember that the printables at picklebums.com are for personal use only, you may not sell, share, or link directly to these files.
We’d love to see how you play with the printable roads.
If you have fun playing with our printable roads we’d love to see some pictures! Tag me on instagram (@picklebums) or share a photo on our facebook page.
Thanks to the TAC we have some brand new free printable road signs and accessories that match these free printable roads and compliment lots of road safety learning. You can find great tips for helping kids learn about road safety and download the free printable road signs set here.


Hi! I love your printable roads! We made some similar ones out of felt for our daughter. Took a bit longer but fun to make :)
We featured your post in a round up of similar do-it-yourself toy car ideas on our blog and linked back here!
Love your blog!
Thank you for sharing the roads…my daughter is using them as we speak for her “Lego” town!
Muchas gracias Kate por compartir todos estos imprimibles .
gracias, exelente idea. Nos alegro una tarde de lluvia. Utilizamos el reverso de papel usado y una caja de carton para incluir pendientes y un tunel
great, thank you very much :-)
how simply awesome! I’ve been looking at the expensive track sets in the store and not liking what I’ve found. I laminated the roads and added tabs with velcro so that they can stick together much like the wooden and plastic train sets connect. My kids love them! I also saved on ink by printing one set (draft quality) to serve as a template then used BLACK cardstock with white out (no white paint in the house) to make multiple sets. Thanks for the idea!
I have been looking for something like this for ages! The little boy I look after is going to absolutely love these. BIG THANKS!
I made one copy and now I’m off to the photocopier- much cheaper 5 cents a page :)
I found an ink website that I love. HP has a website that is called HP connect and it makes printing so cheep. I am not connected with HP but I love it and wanted to share with teachers like myself that pay too much for printing. For 300 printable pages they charge $ 9.99. I had an old computer and it didn’t have the capacity for talking to HP so I went and got one from Staples for $50 that was listed on HP’s website because it can communicate with HP. They send you the ink-no charge and just bill you for how many pages you print. They are fast on sending more ink and they don’t care if all 300 pages are all color- it is still the same price. If you go over the 300 pages, they charge about a penny more than what it is for the printed pages on the contract. You can quit if you hate it at any time- which I doubt. I love it and love to see teachers save money as I know they can spend it on other stuff. The website is HP Instant Ink or HP direct.
Thanks so much for share with us
What a marvelous idea! I love using painter’s tape for roads, but this is heavenly, too! Wonderful for older kids as well – let them do the cutting. Thanks for sharing such a creative idea.
These are awesome!
These are very helpful to my preschool unit in land transportation. Thank you for sharing it online and for free! God bless you! :)
Thank you for a super resource. The 4-5 year olds in my class are creating their local area this week, we are going to work in groups to cut and stick these roads as well as local shop logos and houses onto massive sugar paper. This was just what I was looking for, I love that people like you make teachers lives easier, thank you :)
THANK YOU FOR YOUR KINDNESS FOR SHARING THIS…MY SON LOVE IT.
very thanks.. its a great idea… hope i can make it to my little cheeky girl
I just discovered these! Too much fun. I might have to make them in fabric! (Shared on facebook!)
maybe you could minimise movement by sticking a piece of fine sandpaper on the back- IF you use them on carpet?
Thanks so much for this wonderful resource. I’ve written about them + some photos on my blog about being mummy to a car crazy kid. We’ve laminated our roads and I use a tiny bit of sticky tape to stop them moving about. I totally had scissor RSI after cutting out all these roads before and after laminating! Thanks again.
Dzi?kuje:) bardzo przydatne materia?y, gratuluje kreatywno?ci i ciekawych pomys?ów. Pozdrawiam
I have been making fences for zoos with popsicle sticks and jenga (or generic) blocks. simply glue gun 3 popsicle or craft sticks to the flat side of the jenga blocks, top and bottom at the edge and one in the middle. one way this will make a fence. or stand them on end to make bars for the zoo. I also use the wood thread spools with pieces of green in them for greenery at the zoo. use christmas tree/wreath parts of picks and glue gun them in. silk flowers will also work. don’t forget to stick an American flag in one spool to show our pride. ABC blocks are used to spell out the name of the child and then ZOO. first one was for my little friend so was FREDS ZOO. he liked to call the green stuff food for the animals. He already had lots of animals. and lots of cars so I also spelled out PARKING LOT and made a parking area. I set this all up in an old white bookcase. worked well as he could see it all and it was not spread out all over the floor. He also would make one shelf for Artic animals, one for Jungle. I am now making another one and have been collecting all sorts of nice natural wood. made food troths and lined them with blue for water and green, light green and brown painted wood pieces to simulate food. Made a large (4″ x 6″) pool with blue and wood sides for the seals, whales, sharks and other water animals to live in. any of these things got made to the size of the blocks that i had that could fit together. For about 18 months I have been collecting items from thrift shops. even found some wheels so made some carts to take animals from one cage to another. also found some flat green pine trees that will be nice to go in the back as they will not take up too much room. Have not found people at thrift store yet, but have seen them on line selling for doll houses. then i would have to make picnic tables and benches, etc. Did find many farm animals so am making that as another box of goodies. for that one I only glued craft sticks to the top and middle of the jenga blocks. Hours of play for girls or boys and they will add to it animals, cars, people they have. other blocks will be good for animals to climb on. and additional boxes will appear to make more living quarters for the different animals. also lends itself to crafting with kids. chunks of white packing material can be made into icebergs. egg cartons can be cut to make boulders. sticks, pinecones, etc. can be gathered for landscaping and for monkey habitat. so much to stretch imagination. Sorry i have no pictures but to all — Have Fun. Karen