Recently my girls have been interested in knitting and weaving. We had a go at finger knitting during the holidays, but I am no knitter, finger or other wise, so we moved on to weaving.
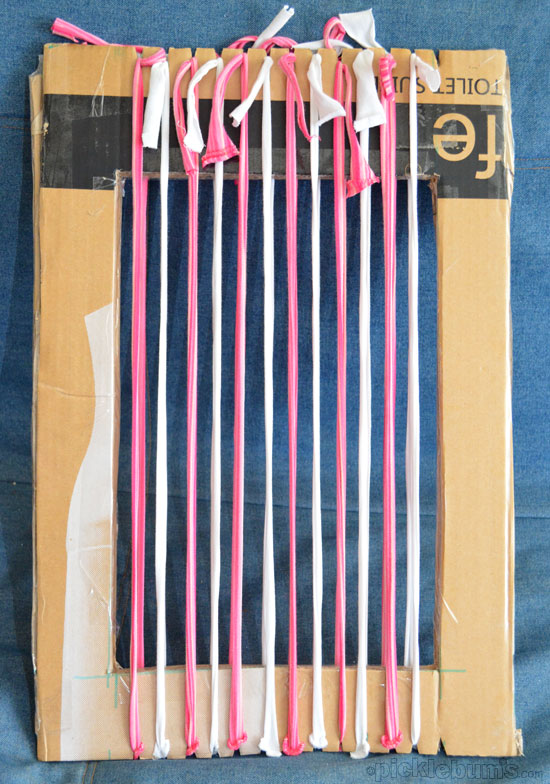
I made a very basic loom from bits of cardboard. I cut a window out of the middle of a piece of cardboard making a frame, then strengthened it by cutting another matching frame and taping them together. I cut simple v-shaped notches in the top and bottom to hold the ‘warp’ – the ‘threads’ that run up and down the loom.
After checking out some instructions and ideas online and looking at what materials we had on hand I decided we’d make some ‘t-shirt yarn’ to weave with. I used this tutorial on you-tube to cut some of our old t-shirts into continuous strips, but later discovered that the balls of yarn were too bulky to weave with and the girls wanted to change colours often, so cutting simple loops off the bottom of the t-shirts would have worked fine for this project.
I attached the warp threads by tying them around the look and securing with a single knot, the stretch in the t-shirt held them in place behind each notch. I alternated the colours to make it easier for the girls to follow the ‘over and under’ waving process.
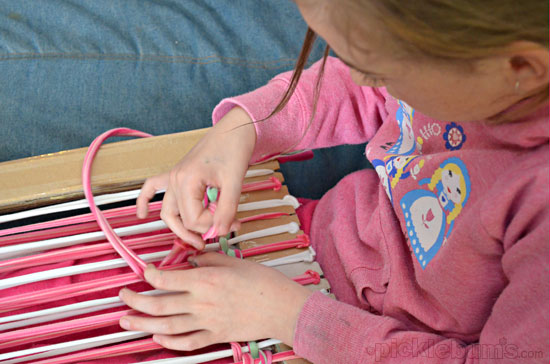
Weave your weft thread (the thread that goes across your loom) over and under the doubled warp threads… this is important when you get to the end.
We joined the different coloured weft threads with a simple knot and made sure we kept all the knots on one side of the weaving – this became the ‘back’ of our mat.
I was surprised at how quickly the girls picked up the process and with the nice thick t-shirt yarn it didn’t take them long, taking it in turns, to fill our small loom.
To get your weaving off the loom, carefully undo the knots at the top of the weft threads. Tie both of the first weft threads to one of the threads next to it, then tie one thread of each colour to each other across the top of the weaving. So we tied both the first two pink threads to one of the white ones next to it. The other white thread we tied to the next pink thread, then pink thread to white thread and so on.
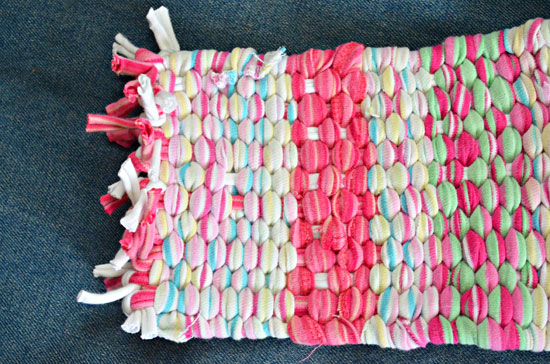
We cut the bottom weft threads and did the same to get our weaving off the loom and secured.
This weaving caper was a bit of an experiment for all of us. I wasn’t sure my loom would hold up, if the girls would lose interest quickly, or if our weaving would simply fall apart after we were done. I was pleasantly surprised with how keen the girls were and our mat is now a blanket for teddies and toys and has held up quite well.
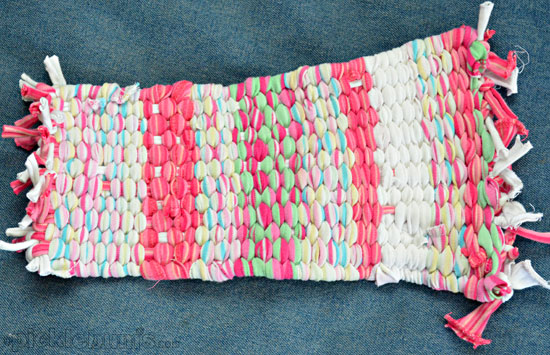
The girls are quite keen to take on a bigger project and we’ve been eying off this hula hoop rug for the last few days… but we’ll have to find a lot more old t-shirts to cut up first.
Have you ever done weaving with your kids?

Great first weaving project. I almost wished I hadn’t clicked through to the link for hula hoop weaving because I need to make one and just don’t have the time. I wonder if I can wait till the school holidays?
Didn’t it turn out great? We’ve been doing some weaving in the garden this week, using strong grasses to make animal shapes
I love your loom. Brilliant!
Little Eco and I will definitely be giving this a go. Thank you :-)
We went to the Australian Tapestry Workshop in South Melbourne a few weeks ago for the open house weekend. I really wanted to go after seeing a tapestry in the museum along with a video showing how it was done. The kids did a small weaving project a bit like yours and they had a ball! We also get to see a tapestry being woven while we were there. Great fun for everyone!
Oh that is very cool. I will have to see if Annie is interested in trying this on the school holidays.
You did remind me of this very funny post I read on Saturday http://pinstrosity.blogspot.com.au/2012/08/t-shirt-rug-more-like-t-shirt-ugh.html
I’ve been thinking a lot about weaving lately, I’ll have to start a weaving project soon