
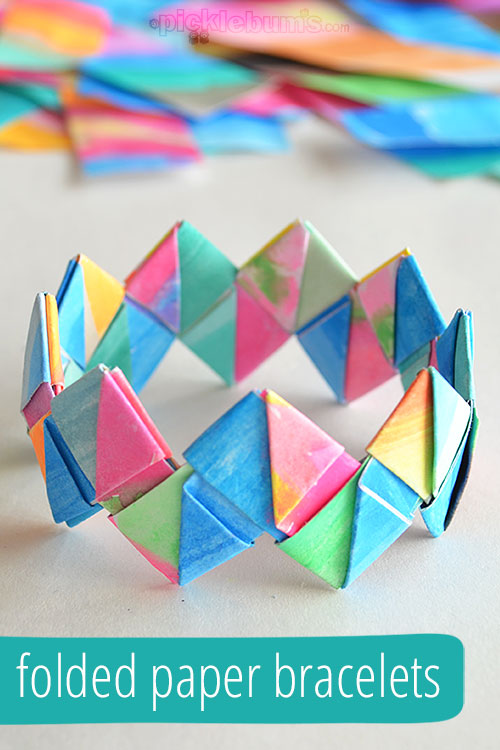
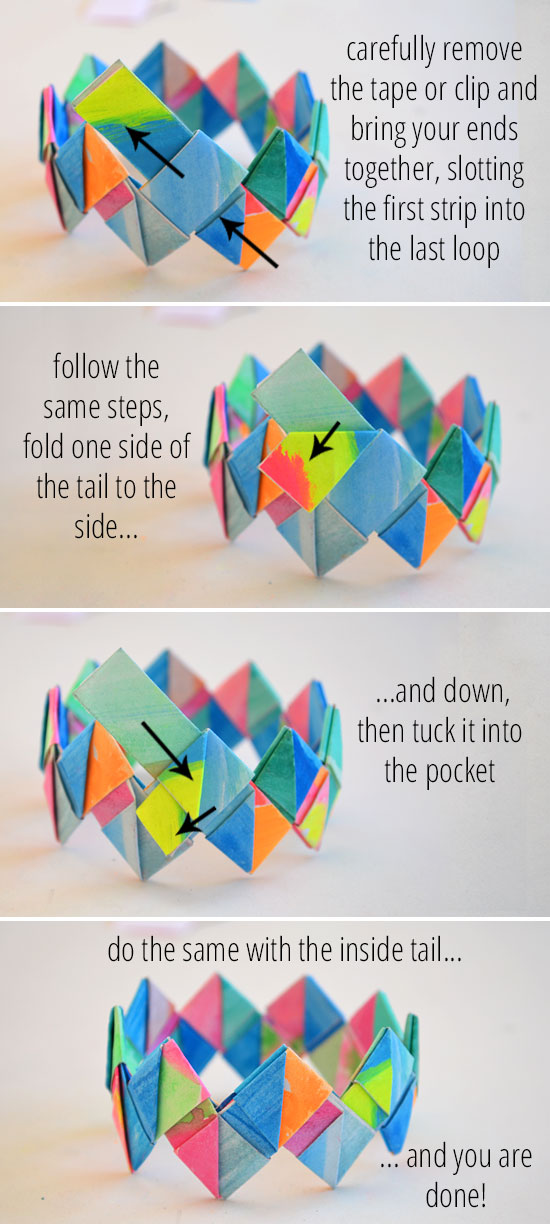
How to Make Folded Paper Bracelets
Making a folded paper bracelet is a fun way to keep the kids busy and to use up old paintings. Plus, they look so pretty!
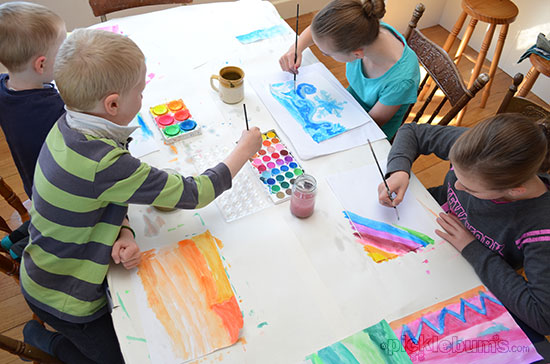
We love our watercolour paint sets. I mean, we really love them.
I don’t think a week ever goes by when someone doesn’t get out the watercolours for a little painting. One of the big kids got them out on the weekend, and before long all four kids were busy filling the paper with colour.
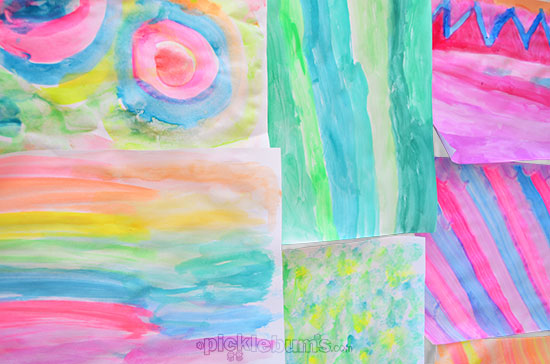
With so much painting, there is always a pile of finished artwork in my study and recently I remembered a fun way to use it. Cleaning out some paperwork I came across an ancient photocopied sheet of instructions for making folded paper bracelets. I remember making these as a teenager, and I knew my kids would love to transform their paintings into wearable art so we got out the pile of paintings got to work!
How to Make a Folded Paper Bracelet
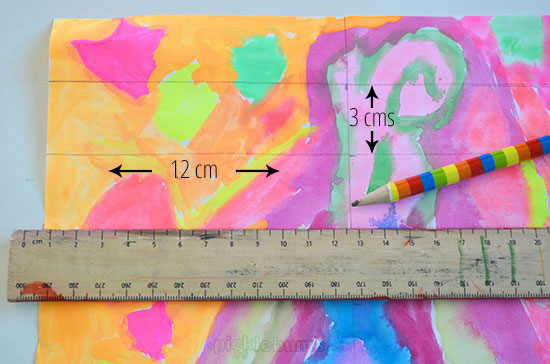
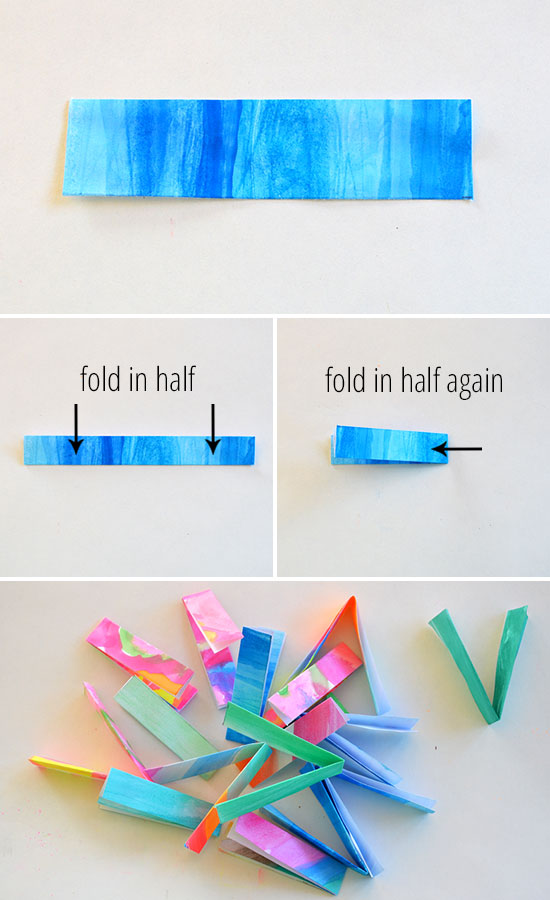
To make a folded paper bracelet you need 16-22 strips of paper. The strips of paper need to be 12cms x 3cms, bigger or smaller is fine, as long as the size ratio is 1:4.
We worked on our maths skills, counting by threes to rule up the paper and then I cut the strips with a paper cutter to making lots of strips quickly and easily.
For each bracelet you’ll need between 16 and 22 strips, depending on how big a bracelet you want to make. We used 18 strips to make one big enough to fit over my ten year old’s hand.
Now that you have your paper strips, follow the instructions below to fold them and construct the bracelet.
Begin by folding your strips into the basic shape, my six year old was good at this process.
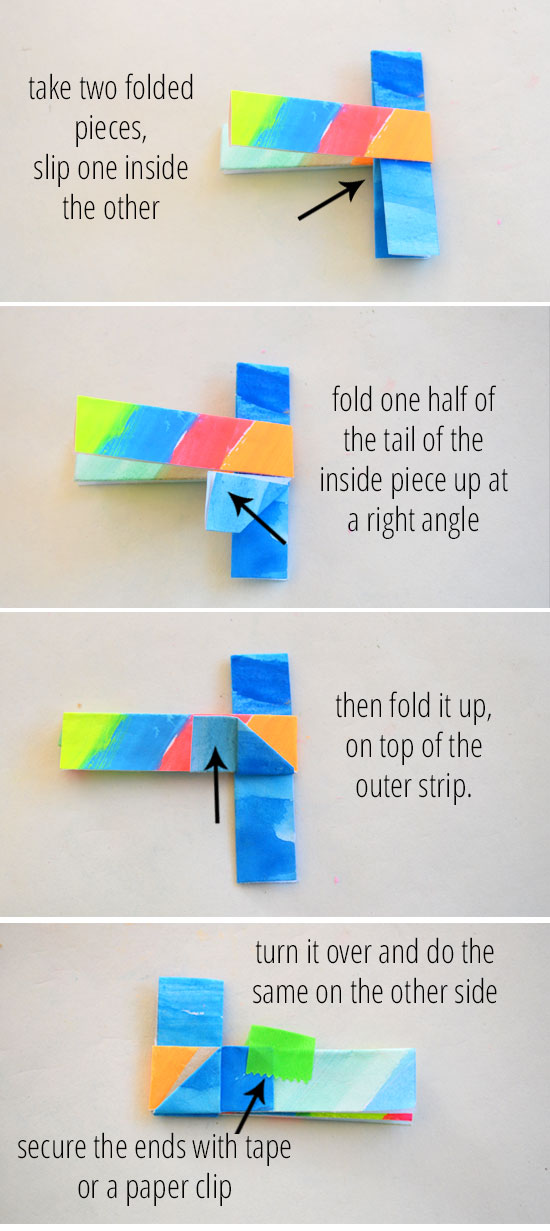
Now you need to learn the basic construction technique. This is a little tricky but with help and supervision my girls (aged ten) were able to master the process after some learning time.
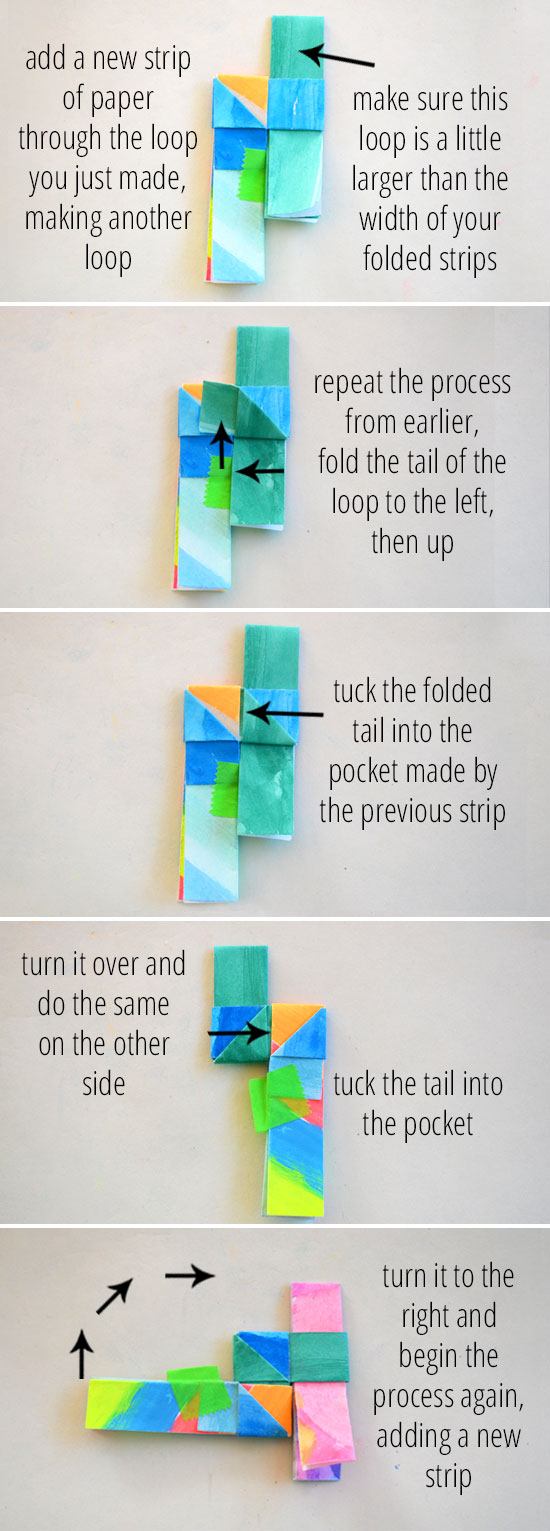
Once you’ve got the hang of it, keep adding strips. I suggest making the loop part of each strip a little on the large size when working with kids, it will look a little less neat and symmetrical when finished but it makes it much easier for kids to insert the next strip.
Keep adding strips…
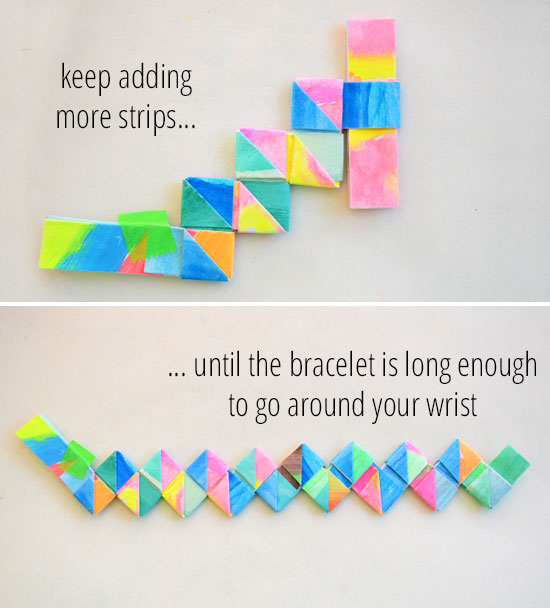
Eventually you will have a long enough chain to make a bracelet. Remember it needs to fit over your hand when it is done, so don’t make it too small!
Our folded paper bracelets turned out even better than I remembered! The colours of the kid’s paintings looked fabulous all folded together.
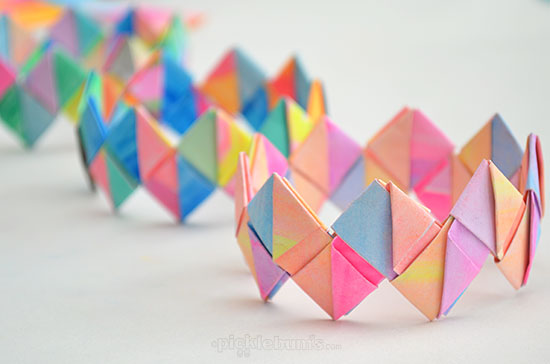
They would make an unusual and one of a kind gift don’t you think!? Perfect for Mother’s Day or an activity at a tween party?
We are working on folding a really big one to make a crown!

What do you do with your kid’s artwork?
We used our favourite watercolour paints and water soluble crayons to make these paintings. My kids love watercolour paints because there are lots of colour options, and I love them because they are quick and easy to set up and not super messy. One of our all time favourite sets is the fluro tempera blocks, the colours are so awesome!
These are AMAZING! I’ve never seen them before so I can’t wait to try it out myself. Such a great way to use kid’s artwork. The water colour makes these bracelets look so pretty!
I have a question for you that I hoping that you can help me with. I have signed up to receive your blog for a while now. Well recently I haven’t been receiving your updates. I come to your posts and see that you have posted, I just have received them. I thought I was maybe “timed out”? So I have signed up (again) to receive your posts, I get the message that I am already signed up. Your posts aren’t going into my “junk” pile. I have just stopped getting them. I don’t know much about the computer, I thought maybe you could help me to receive your great posts again?
Thanks.
I’m sorry you are having trouble Mary, maybe it is glitch with the service I use to send my updates.
Can you contact me via my contact form (link up the top right of my blog) so you can privately tell me the email you subscribed with and I will manually have a look and see if I can sort it out. :)
Oh WoW! These are Gorgeous :) Pinning it!
These are a fabulous idea. We have a heap of paintings/artwork that I haven’t really known what to do with, I didn’t want to throw them out. Some of them the kids stick up on their bedroom wall and I thought I’d start using them as wrapping paper for gifts. Thanks for another idea for what to do with them.
When I was a kid I used to make these with gum wrappers. How nice to see it done upcycling their paintings.
We used to make the with gum wrappers also! I was just telling my granddaughter that last week! Wow! Talk about the good ole days! Lol
Just made one of these! I am from Australia but currently living in working in Uganda and was craving a crafty moment! The kids I live with here love it! I can see that I may be roped into teaching them how to make them also. Pity I can’t comment with a photo for you. Thanks for your tutorial! Love Pinterest!!!
these are amazing. Can’t wait to try it and amaze my co-workers. Thanks.
I love that you used the kids artwork to make these, they are gorgeous! I’ll be featuring them on The Crafty Crow soon :)
simply wonderfull….. I’ll try to make them with my kids. I love them and linked your post in my blog.
U r creative !!! Thank u very much . Proudly pin it.
I remember making these out of chewing gum wrappers when I was young. Yours are much prettier.
I love this idea! I’ve always made these with Starbursts wrappers but I don’t eat Starbursts anymore and I’ve been wondering what else I could use. Artwork would work great!
Wow! Your kids make beautiful water colors. You might should consider giving them plain white cotton fabric yardage to paint with dyes and use the fabric for quilting or even sell it on etsy. I’d buy some for sure!!!
What a GREAT IDEA! I Soo love it!!
This would also be wonderful on a road trip or long airplane trip. Fantastic idea.
Thanks for sharing
Does anyone have any ideas on making DIY water color? I know there must be a way! Thank you :-)
I use to make these with the wrapper from my sticks of chewing gum when I was in junior high. We made necklaces out of them. It was lots of fun. Now I’m teaching my granddaughter to make them out of construction paper, old wrapping paper, or old magazines.
Nice it took me some time to understand though
Me too mine took me many hours it was for a club meeting
supperb…………… i try to do it
This is too cute. :D
I love this. Takes me back to highschool when my mother taught me how to do this with gum wrappers. Can’t wait to show my daughter.