Plain, Boring, Easy, Homemade Bread

When I first decided I wanted to make homemade bread it was a big challenge. I didn’t have a lot of kitchen skills back then, and I made a lot of really terrible loaves of bread.

I made loaves that were more like lumps of rock, loaves that were all squidgy and doughy in the middle, and loaves that were flat and pathetic. But every failed loaf of bread taught me something, and took me one step closer to a successful loaf.

These days I can make a loaf of plain, boring, homemade bread in my sleep, well almost.

I still have the occasional failure, bread can be fickle like that, but most of the time I turn out a nice crusty loaf of homemade bread, which my kids manage to devour in around 3 minutes. These days making homemade bread has become easy.

Easy homemade bread recipe.

I learned a lot from my bread fails…

I learned that our little bread machine can not cook a loaf big enough for our family, so don’t even both trying.

But I also learned that using the bread machine to knead and rise the dough is not cheating, it’s genius!

I learned that getting a good second rise is essential and a warm oven, (turned off, with the door open) is the perfect place for it to happen when it is cold.

And I learned that my kids will eat even the most disastrous, barely edible, loaves of bread, so it doesn’t even matter if I fail.

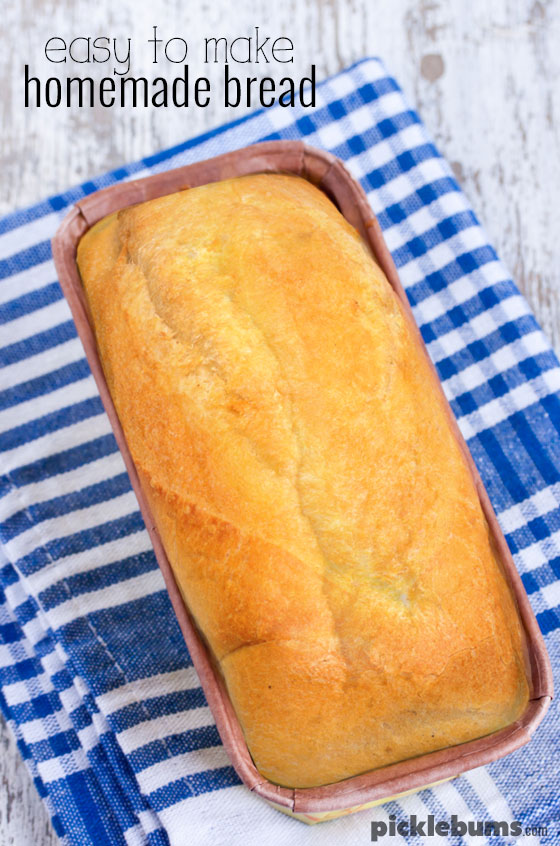
This is the recipe I use to make a plain, boring, easy,  loaf of homemade bread.

Plain, Boring, Easy, Homemade Bread

Plain, Boring, Easy, Homemade Bread

Yield: 1 loaf
Cook Time: 30 minutes
Total Time: 30 minutes

A simple recipe to make a basic loaf of bread.

Ingredients

  • 2 tsp dried yeast.
  • 1 tsp sugar (or honey)
  • 375ml (1 1/2 cups) lukewarm water
  • 500gms (approx 3 1/3 cups) plain flour
  • A little olive oil for greasing and brushing.

Instructions

  1. Add the yeast and sugar to the warm water and let it sit for a few minutes.
  2. You'll know if your yeast is alive if it starts to form little bubbles.
  3. Add the flour to a large bowl, make a well in the centre and add the yeast mixture.
  4. Stir with a wooden spoon until combined, and then use your hands to bring the dough together. You may need to add a little more flour or water, to make the dough soft and springy, but not too sticky.
  5. Turn the dough out onto a well floured surface and knead well for 5+ minutes.
  6. Form the dough into a rough ball shape.
  7. Brush a bowl with olive oil and place the kneaded dough into it, turning it over to coat the top of the dough with oil.
  8. Cover with cling wrap or a damp cloth and leave it somewhere warm to rise. It needs to double in size and will take around 1 - 1 1/2 hours.
  9. Or - Put the ingredients in the breadmaker container and set your bread maker to the 'dough' setting. The bread machine will mix the dough ( check after a minute to see if you need to add more water), knead, and rise the dough.
  10. Once the dough has had it's first rise, 'knock the air' out of the dough by kneading it for a few minutes until it has gone back to it's original size and is nice and soft and stretchy.
  11. Grease a large loaf tins and line it with baking paper.
  12. Form the dough into a rough loaf shape and pop it in the tin.
  13. Brush the top with olive oil and place it in a warm spot to rise again.
  14. The second rise should take around 30 minutes and the dough should rise up to almost the top of the tin.
  15. While you are waiting for the dough to rise for the second time, preheat your oven to 200 Celsius.
  16. Bake the bread in a preheated oven for around 30-40 minutes, or until it is golden on top and cooked through.
  17. Turn the bread out of the tin as soon as it is cooked and allow it to cool on a wire rack before slicing.

 
Please note: this recipe uses Australian measurements and temperatures, if you need to convert measurements or temperatures you can find our printable cooking conversion chart here.

I know it seems like there is a lot of steps involved in making bread, but there isn’t actually all that much work. Most of the time it does it’s own thing, you just need to give it some attention now and then… it’s a lot like a child really!

Do you make bread?

Have you got a favourite, basic, homemade bread recipe?
Have you got any tips for baking the perfect loaf?


Get play & learning ideas,
plus lots of free printables!

Subscribe to get our newsletter full of fun each week!

    We won’t send you spam. Unsubscribe at any time.

    Leave a Reply

    Your email address will not be published. Required fields are marked *

    22 Comments

    1. I don’t usually fuss about the second rise… once the bread is ready to go I sit it on top of the oven and turn it on. Once it’s preheated, in it goes. I don’t usually do loaves tho, just rolls and pull-aparts. But they all work beautifully without the whole ‘doubling in size’ bizzo the second time.

        1. I didn’t see the salt in the ingredients so I added a tsp. it was tastier. But, after all she did say boring plain bread. it turned out perfect! Thank you for this delicious recipe.

    2. Thanks Kate. :) I’ve been meaning to make bread again ever since you last posted about it. I found a couple of equally simple recipes but just haven’t got around to doing it…

      1. Oh I am not help to you on the gluten free thing… the few times I have attempted gluten free bread it has been a disaster! Sorry!

    3. Successful first try! This was so easy thank you. Would it hurt to either add a bit more sugar or salt just to give it a tad more flavor one way or the other? It’s great as is I’m simply curious ??

      1. You could certainly add extra of either salt or sugar, just try it out and see what you like best.

      1. You can use the same amount of yeast, and the timing should be similar, but it really depends on your flour and how warm it is in your rising spot, so just keep on eye on it and try to get ti to double in size.

    4. I needed a quick ? bread. I actually put my dough in large bun trays because I couldn’t find by loaf tin so they cooked in half the time in the oven. I have to say it is the nicest bread I have ever tasted. This is my go to bread from now on. I was not expecting such a good result. They are so delicious as little bread buns ? Thank you so much.

    5. Turned out exactly as advertised and was exactly what I was looking for: plain and easy. I was looking for a simple recipe to make weekly bread and this is what I’ll use from now on. Thank you so much!

    6. Thank you Kate. This 75 yr just made a loaf and it is still cooking but I need to tell you that this is the first loaf of plain bread I have ever made. And its looking awesome in the oven. And yes I will take note of others who have made suggestions and maybe add a little, and I am thinking (before I taste it) more sugar. You are awesome. Thank you

    7. Worked out great for me first time so pleased! Definitely would add a little salt next time but its not really necessary personally especially as we usually add flavourful spreads, fillings etc. that it doesn’t matter all that much. I accidentally left the second prove way too long as I thought putting my kids would be quicker than it was lol which I think ended up making the bread a little denser than expected but saying that, we still smashed 2 loaves in 2 days so off to make some more haha thank you for this recipe!

    8. I intend on adding salt next time but it rose beautifully both times and crust is delightfully crispy and inside is soft.

    9. Thank you for all the details included with this wonderful bread recipe. There’s nothing better than a homemade bread baking in the oven and the smell that surrounds us while spending time with family.

    10. your times are off. the total time is 30 mins according to what’s posted…. but does not include the rise time. might wanna change that.