
My kids are a little bit movie and animation crazy at the moment.
It is Izzy’s goal in life to watch ever Tim Burton film ever made, and Zoe is slowly reading every book that has been made into an animation by Hayao Miyazaki. Izzy is going to be a director when she grows up and Zoe is going to be an actor, or an anime/manga artist. And the boys… well they just love watching all the cool movies their sisters are obsessed with.
We were given passes to see the Dreamworks Exhibition at the Australian Centre for the Moving Image these holidays and the kids loved finding out how some of their favourite movies were made and playing around with some of the hands on exhibits. They even got to use the fancy digital drawing tablets the ‘real animators’ use and have a go at making a short digital animation.
ACMI has lots of fabulous free exhibits too and when we were there they were running a drop in session where the kids could have a go making stop motion animation with little paper shapes. It was really cool so we were keen to play around with the idea more at home.
We’ve played with making our own stop motion animation a little bit using an ipad app called iMotion HD.
It’s great fun and really easy for the kids to use, but we struggle to set up the ipad in some kind of stand so it can take clear pictures and not move between each frame. So this time I dug out our old tripod and we used my DLSR to take lots of single images that we combined into an animation after downloading them to the computer.
This turned out to be a really fun and pretty easy way to make a simple animation – here’s how we did it.
Planning The Animation
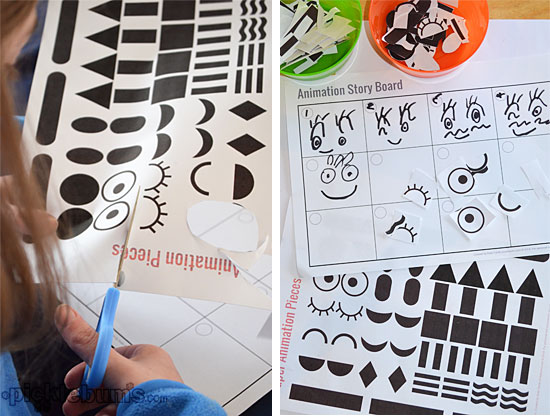
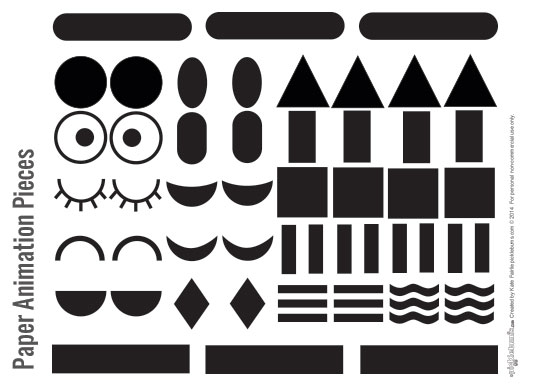
I loved the simplicity of the paper pieces we played with at ACMI so I created a set of simple shapes and printed a sheet for each of us to cut out.
You can download a pdf version of the paper shapes here.
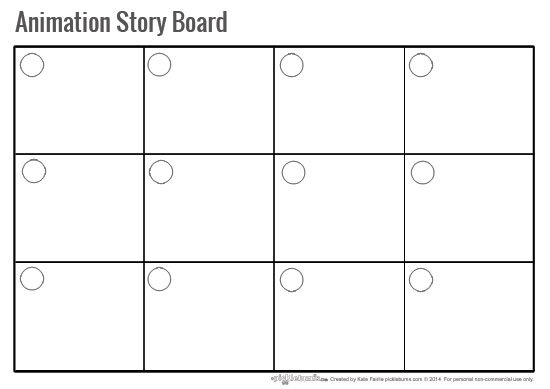
I also created a very simple story board so we could organise our stories before we tried to animate them. We started off with very simple ideas, keeping them short and not using many pieces so we could keep track of everything
You can download a pdf version of the story board here.
Capturing Images
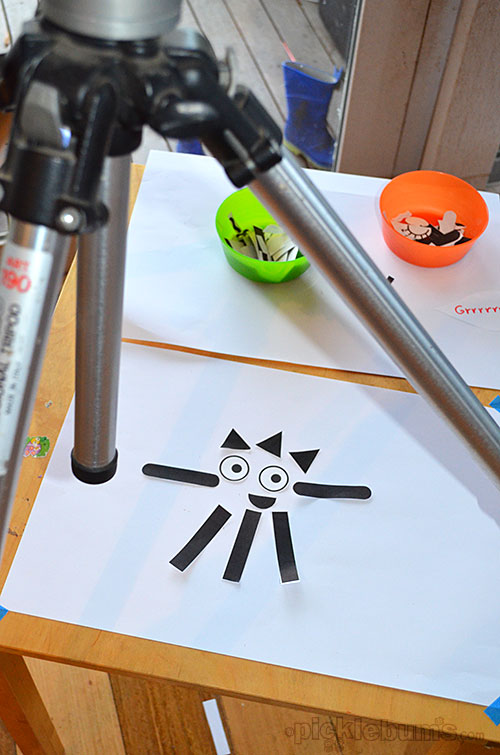
We set up a simple ‘animation studio’ on a small table with a piece of paper taped to it. We set up the camera on the tripod directly over the paper.
We set up our paper pieces in their starting positions, then moved them slowly around, taking a single photo of each movement.
The story writer movied their paper pieces while a camera man took the photos. The hard part was not bumping the table or the tripod while we worked!
Keeping the stories simple meant we only took 8-12 images for each animation, which makes things much more manageable when it comes to keeping the story and animation straight and when it comes time to work with the images on the computer.
When we had all the images we downloaded them to the computer to edit them and animate them.
There are several ways you can do this, we tried the following two ways…
Animating Images with Photoshop.
Because I am used to working with photoshop this is where I started.
You need to edit every image in the animation in exactly the same way to keep them looking consistent, and resize them to the same size. We resized ours to 500×500 px to keep the file size manageable and so we easily could upload them.
Once the editing was done we created a new document in the size we wanted and dropped each image into that document as a separate layer. We used guides to make sure we lined each image up in exactly the right place.
Then using the timeline tab (or animation tab depending on what version of photoshop you have) you animate your images by selecting ‘make frames from layers’ from the pop up menu on the far right of the tab. Adjust the time each frame is displayed, we used 0.2 seconds per frame, and then hit play to see your animation in action!
If all looks good then use the ‘save for web’ option to save your animation as a gif, make sure you set the looping option as ‘forever’ if you want it to play over and over.
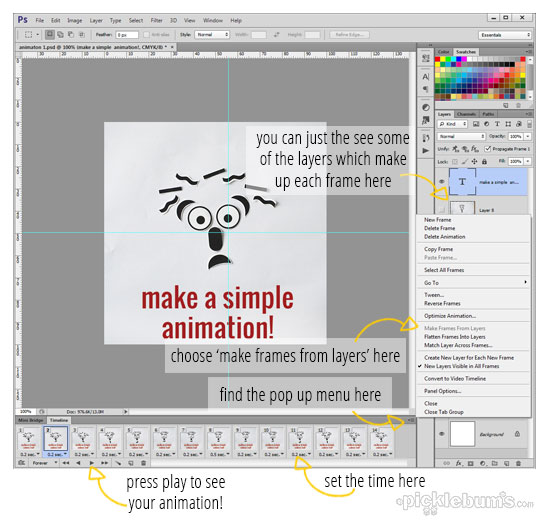
Here is a MUCH better tutorial for animating with photoshop from I Heart Faces with step by step instructions and images, and they show you how to do with live action photos which is very cool.
Animating Images with Windows Live Movie Maker
Another way to animate your collection of images is to use Windows Live Movie Maker (I am sure this works in a similar way with the Mac editing software too).
Again, make sure any editing you do is consistent across all the images and resize them if needed. Then just add all the images to your ‘movie’ using the ‘add images and video’ button, make sure you have all the individual images highlighted, go to ‘video tools – edit’ and change the duration to 0.2 sections.
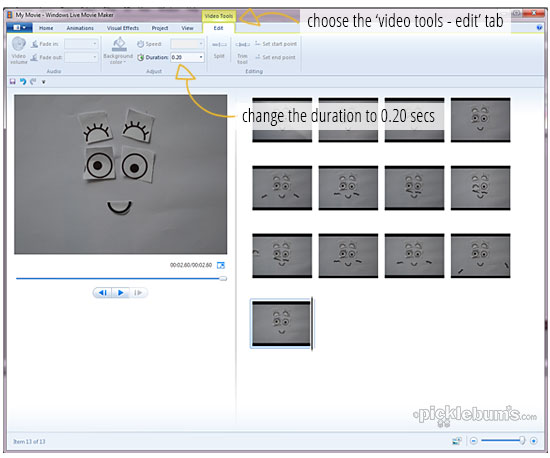
Now press play!
Movie maker creates video files so they will be larger than the animated gif created by photoshop, but you can add fun things like sounds and music and easily share via youtube.
Here are some of the other fun animations we made…
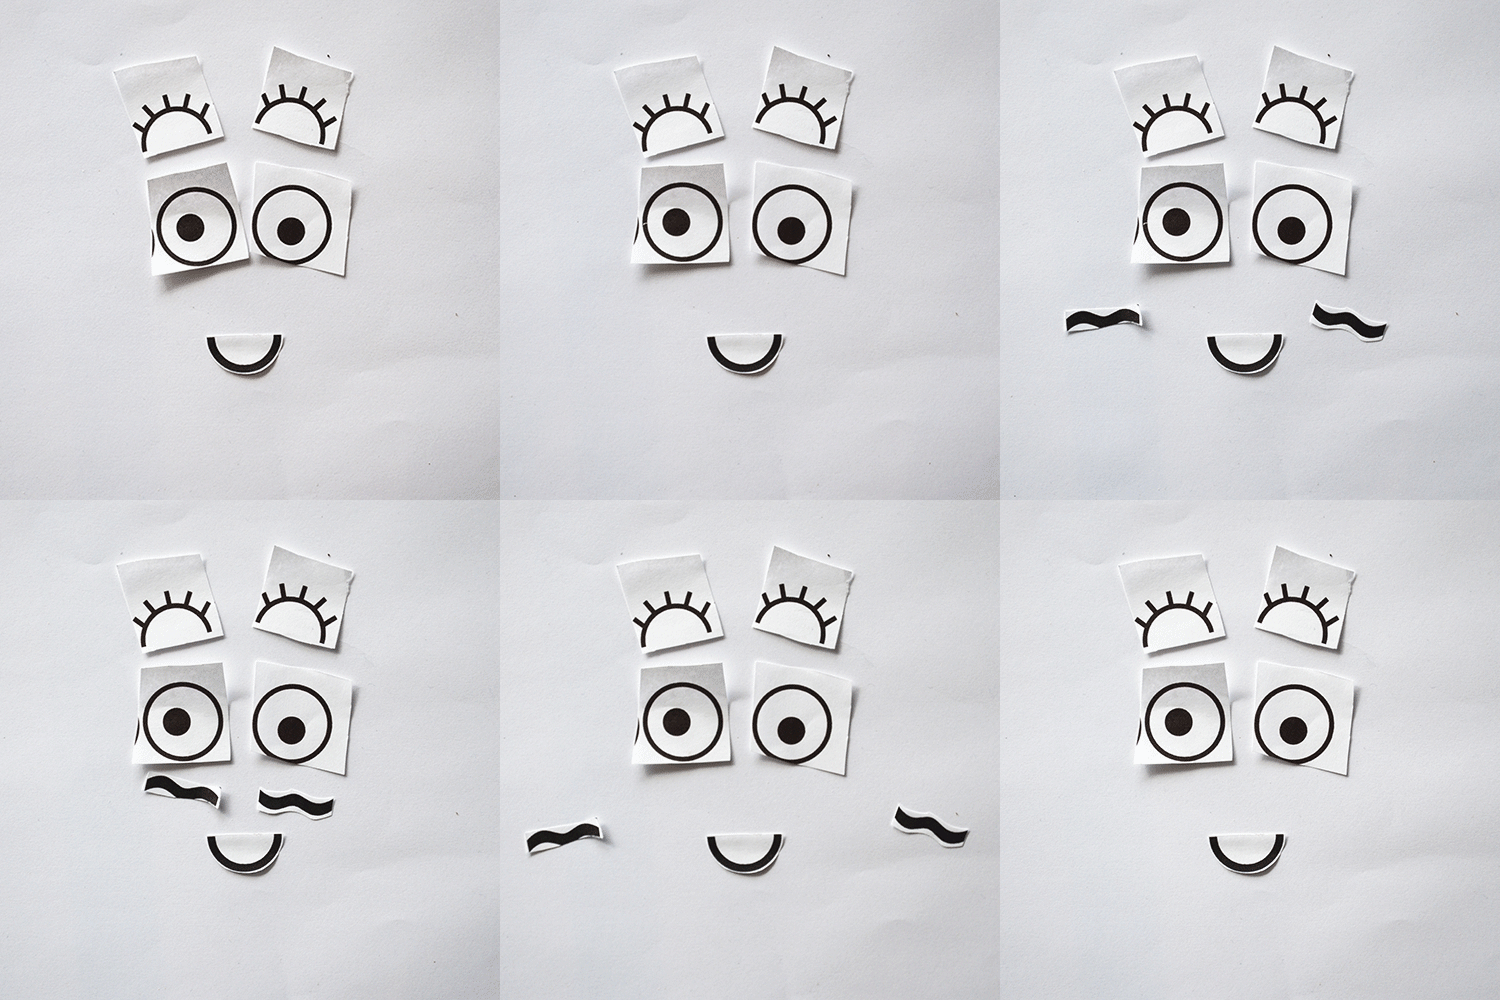
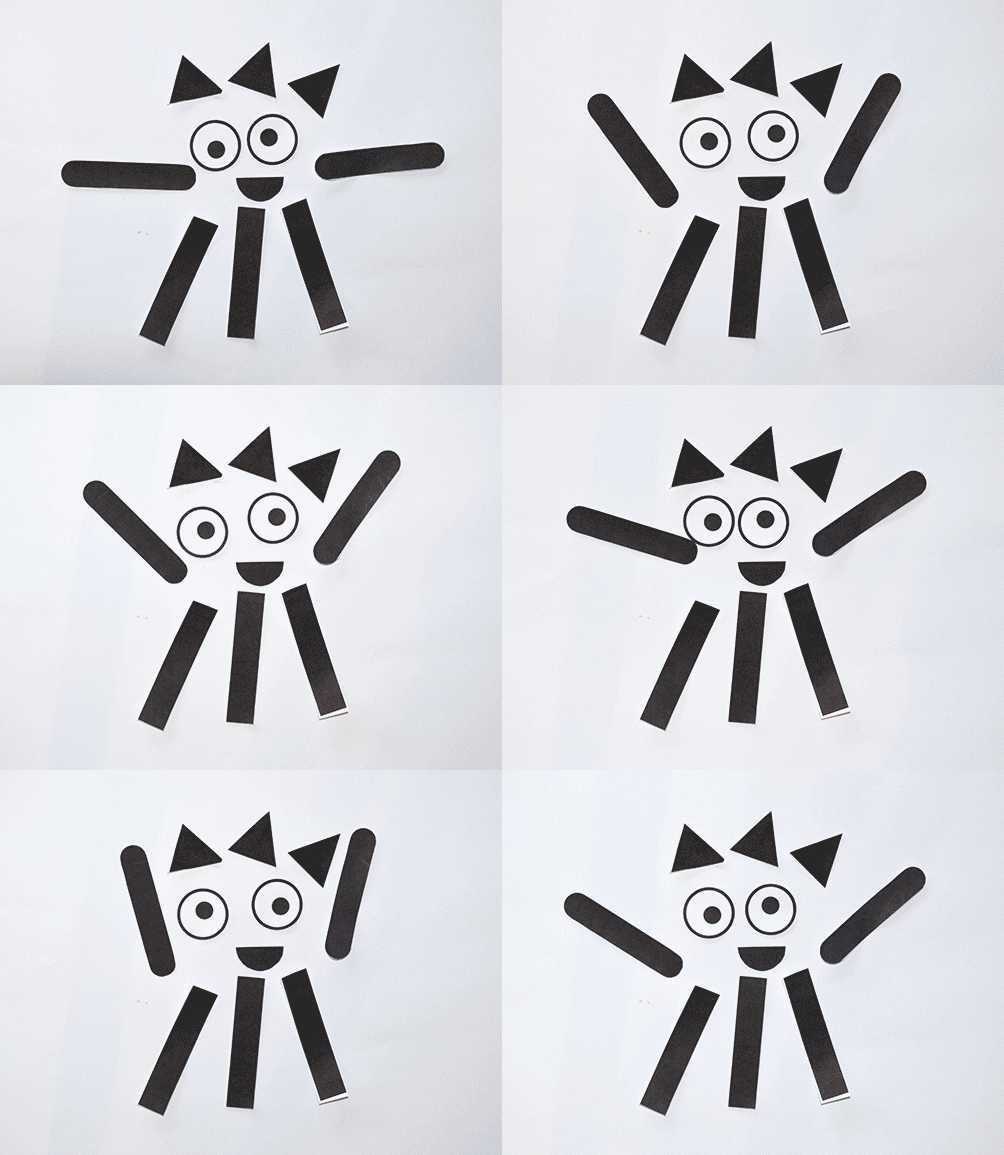
There are also a couple of free online animated gif editors that you can try such as gifmaker.me and ImgFlip, and many other photo editing or video editing software will also have options for animation a series of images.
Here are few more tutorials we found:
How to make an animated gif using ImgFlip from Smart School House.
How to make an animated gif with GIMP (free photo editing software) from Make Use Of.
Making a stop motion animation move with imovie from Photojojo

This is awesome! I love the entire post, from printable to video. Can’t wait to share it :)
I love it too!!
I love the printable shapes. We’ll make good use of those. Thank you sharing your process! My kids love to use the Smoovie app for animations. Really enjoy reading your posts. Your creativity is inspiring!
Great post! My son will love making such animations, we have to try this out! :)
This is great!! We’ll be keen to give it a go.
Kathy
Just awesome!
This is very cool! I’d love for you to share on our After School Linky Party so I can feature it next week. What a fun summer activity for kids to do too. You are so creative!
Oh my!!!! This is all sorts of awesome. Thanks for the printables and tutorial.