
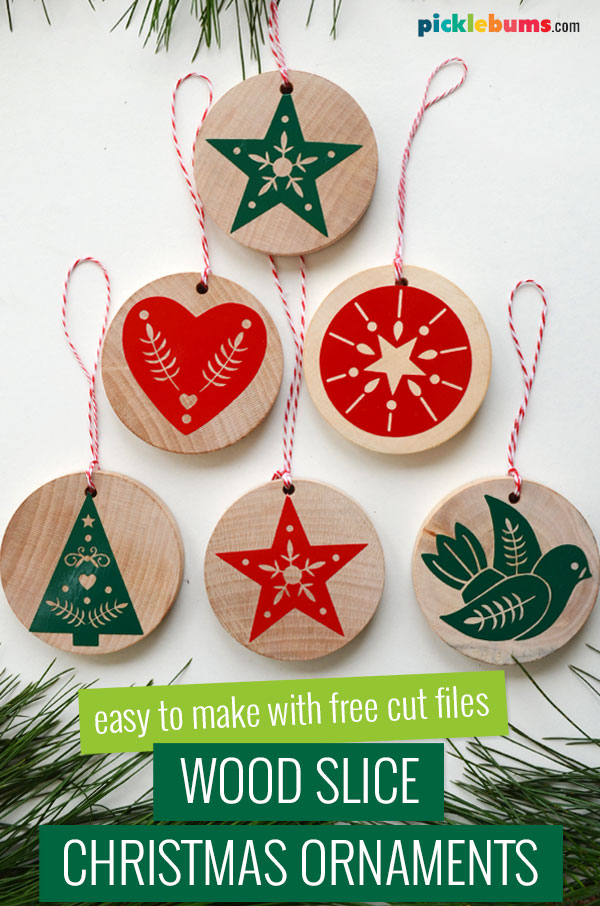
Wood Slice Christmas Ornaments with free cut files
These wood slice Christmas ornaments are super easy to make with these five, Nordic inspired, free, cut files and your Cricut machine.
This project is a collaboration with Cricut – I was gifted a Cricut Maker and accessories to try out.
This post contains affiliate links.
Handmade Christmas ornaments look beautiful hanging on the tree, and they make a great gift, but they don’t have to be difficult to make.
We made a set of these easy wood slice ornaments using my Cricut Maker and a few craft bits and pieces, and they were ready to hang on our Christmas tree, or add as present toppers, in a less then 30 minutes! They are a great project for the kids to help make, or for a teen who is keen to try an easy Cricut or vinyl project.
Using wood slices makes a lovely rustic decoration and the flat surface is very easy to work with. Using your cutting machine you can add whatever design you like to the wood slices quickly and easily.
Using adhesive vinyl you can add whatever you like to your wood slice decorations. You could create your own text designs using Design Space (or the software that comes with your cutting machine) and add a Christmas greeting or personalise your ornaments with a name.
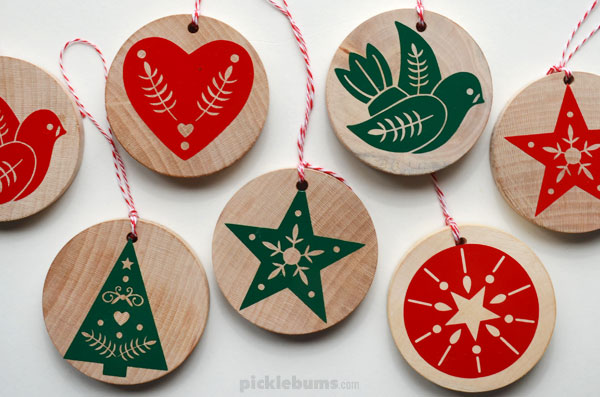
I’ve always loved Scandinavian design so I was inspired by some gorgeous Christmas cards to make some simple, Nordic inspired, Christmas designs too add to my wood slice ornaments. They are simple designs, that use only one colour, which make them an easy project for the kids to make, or for a cutting machine beginner!
How to Make Wood Slice Ornaments
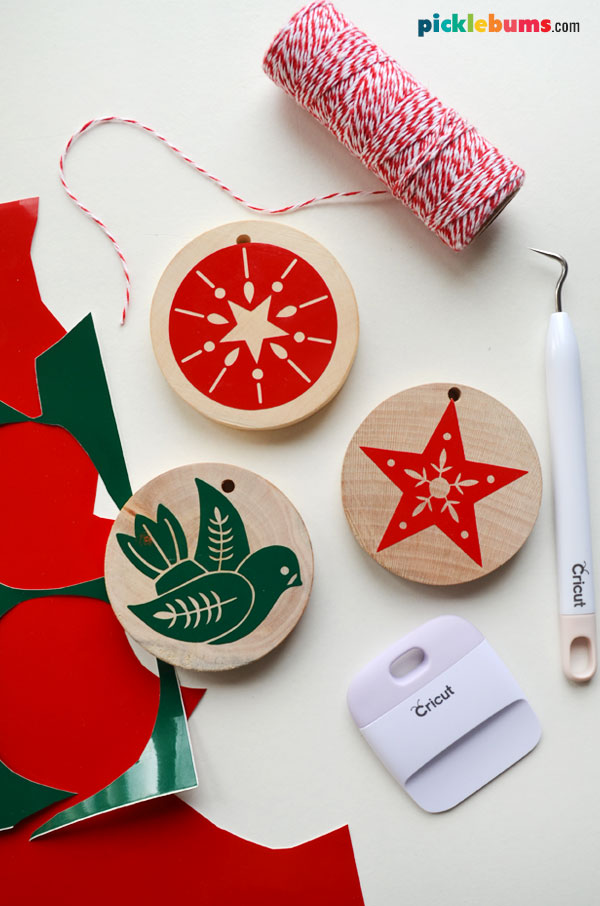
To make these wood slice ornaments you’ll need:
- Cricut Maker (or other cutting machine)
- Adhesive vinyl
- Transfer tape
- Standard grip mat.
- Cricut Design Space account (free to sign up) and computer, ipad or smartphone
- Nordic Christmas Ornament Cut Files (download below)
- Wood Slices
- String
You can buy pre-cut wood slices at lots of craft stores or online, or you could cut some yourself. Of if you are lucky you could have someone else cut some for you, like I did.
My Dad is a wood turner and he made me lots of beautiful wood slices from a variety of different types of wood. They are gorgeous, but I did have to drill my own holes and sand the surfaces so they were nice and flat. Most pre-cut wood slices that you buy already have holes drilled, and a nice sanded surface, but you may need to do a little extra sanding if yours are not completely smooth.
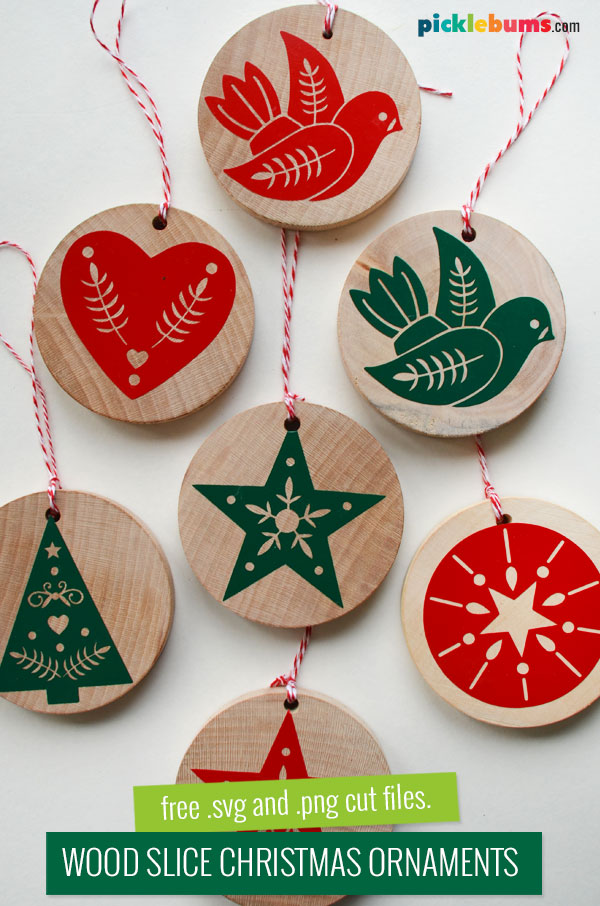
We used premium adhesive vinyl in a bright red and a deep green, but you can use whatever colour you like. Using adhesive vinyl makes this project super quick and easy, but you could also use heat transfer vinyl for this project if you like.
How to Make Wood Slice Ornaments with your Cricut Maker.
I was gifted a Cricut Maker a few months ago and I am so in love with it! It makes projects like these so quick and easy, and they turn out looking so good!
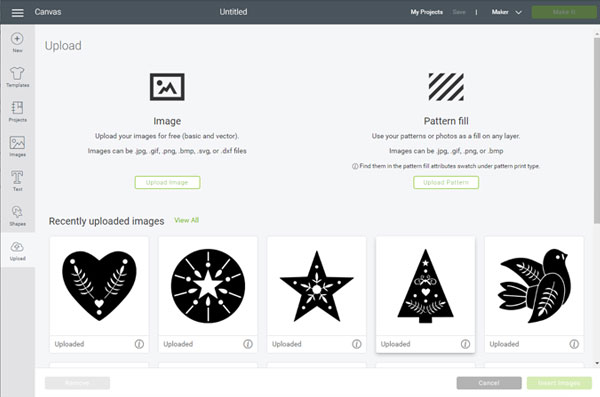
Once you have collected all your supplies open Design Space and select ‘new project’.
If you are using my Nordic inspired ornament cut files (see below to download) you’ll need to unzip the file and save the folder to your computer. To upload the cut files, hit the ‘upload’ button to open the upload page, select ‘upload image’, browse to find the folder you just unzipped, and select the .svg file you’d like to upload. Give it a new name if you like and hit save. Now you’ll see the file you just uploaded and you can select it to add it to your canvas.
Add as many, or all, of the designs to your canvas and resize them to fit your wood slices.
Click ‘Make it’, check the size of your material so everything fits, click continue, select the materials you are cutting, and cut!
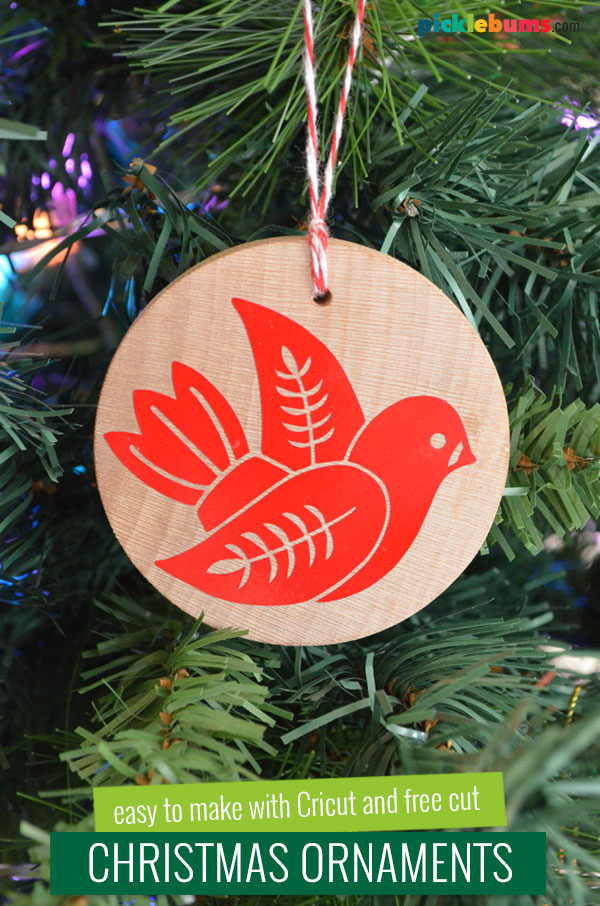
Once you have your vinyl cut, weed out the unwanted areas, and put it on some transfer tape. Make sure the surface of your wood slice is dust free and nice and smooth, then apply the adhesive vinyl as you normally would.
Add a string through the hole in the top and your wood slice ornaments are ready to hang!
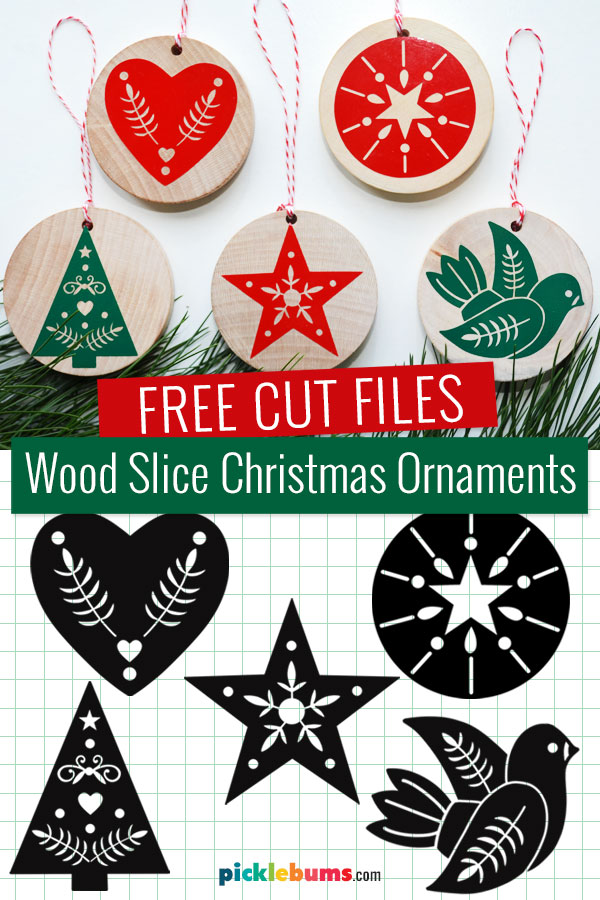
Free Nordic Inspired Christmas Ornament Cut Files
I love Scandinavian designs and these Nordic inspired Christmas designs look gorgeous cut from bright coloured vinyl and applied to plain wood.
There are five different cut file designs – a Christmas tree, a star, a heart, a circle, and my favourite, a dove!
Each is an individual cut file ready to go as an .svg to make this project super quick and easy to make.
You can download these Nordic inspired Christmas Ornament cut files here.
These designs are provided in both .svg and .png formats in a zip file. You’ll need to extract the folder that contains the files and save it on your computer or device.
Please remember that the free printables and files on picklebums.com are for personal use only, you may not sell, share, or link directly to these files.
Love these. Making wood slice ornaments in one of the many projects on my very long “to do” list. Thanks for sharing this on Merry Monday.