
No-Bake Homemade Muesli Bars
These homemade muesli bars are n-bake and you can customise the flavour with whatever add-ins you like. They are perfect for school lunches or afternoon snacks.

It took me a long time, a lot of tweaking, and a few catastrophic disasters before I finally mastered making homemade muesli bars.
This recipe is deceptively simple, but getting the right sticky to dry ratio to get the perfectly chewy, not crumbly, but not too sticky, muesli bar is not as easy as it seems. But there are a few tips and tricks to help you make perfect muesli bars every time… well almost every time… hopefully!
This recipe is based on a combination of this one from Back to the Cutting Board and this one from Zoe’s Lunch Box with my own tweaks and changes.
Whip up a batch of these homemade muesli bars and impress your kids with how awesome they are!
These homemade muesli bars are easy to customise with different add-ins, and they don't require baking.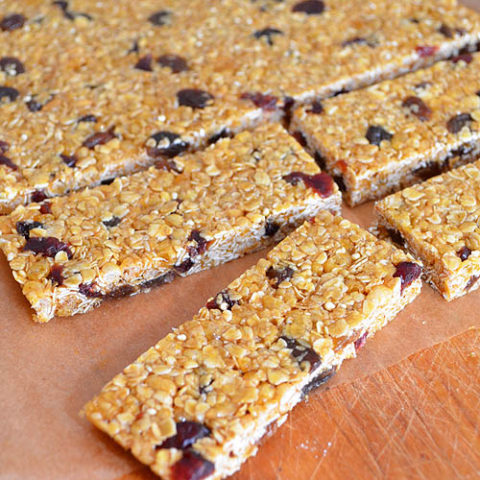
Homemade Muesli Bars
Ingredients
Instructions
Nutrition Information:
Yield: 16
Serving Size: 1
Amount Per Serving:
Calories: 148Total Fat: 2gSaturated Fat: 1gTrans Fat: 0gUnsaturated Fat: 1gCholesterol: 2mgSodium: 30mgCarbohydrates: 34gFiber: 1gSugar: 22gProtein: 2g

Homemade Muesli Bar Tips
Here are a few things I’ve learned along the way and some tips for making great homemade muesli bars.
1. Make sure you use quick cook oats, not just regular rolled oats. The quick cook oats have been cut into smaller bits and soak up the syrup better. You can whiz up some regular oats in the food processor but I found it was tricky to get exactly the right consistency so just gave.
2. Make sure you don’t over cook your syrup. You really want your sugar to just dissolve and not much more, so only let it boil for that two minutes then whip it straight into your mixture. If you find your bars are too sticky you could try cooking the syrup a tiny bit longer, but take it from me… and extra minute can mean the difference between muesli bars and muesli crumbles! Which, by the way are still tasty and great sprinkled over yoghurt for breakfast, so even my disasters were useful!
3. Make sure you push down the mix really firmly. The more you squish it down into the tin, the more firmly stuck together your bars will be.

Homemade Muesli Bar Add-ins
This recipe is really easy to change and add to to make the muesli bars whatever flavour you like.
We add the tablespoon of malt extract for the yummy flavour and the added bonus B vitamins, but the recpe works fine without it.
I often sprinkle a tablespoon or so of quinoa into the mix, or chia, or you could try any number of seeds or nuts depending on your likes and dislikes.
The recipe above calls for sultanas and dried cranberries but here are lots of other add-ins you could use insteads:
- Dried apple and cinnamon
- Dried apricot and coconut
- Dried mango and peaches
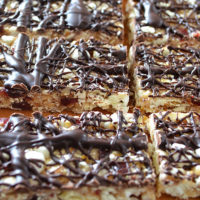
- choc chips (added to the top)
- mini marshmallows (added to the top)
- 100s and 1000s or sprinkles

Muesli bars can be expensive to buy, and if you have nut allergies (like my kids do) it can be hard to find one without an allergy risk, so it’s worth the effort to have a go at making your own. Hopefully, with this recipe, and my tips, you’ll be making the perfect homemade muesli bars to impress your kids!
(This recipe was originally Posted 08/04/2013 – Updated 30/06/2019)
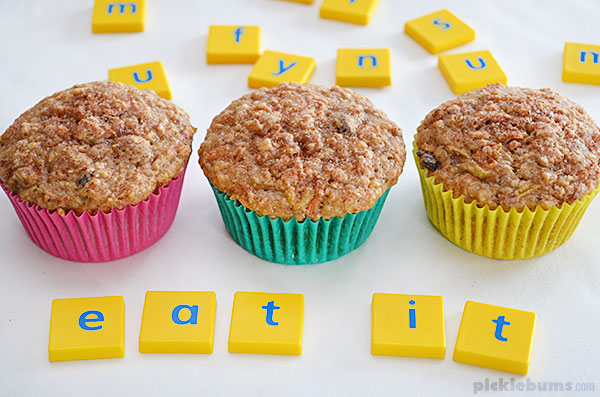
If you are looking for more great snacks for kids, check these out…

How did you know that I was looking just for a perfect recipe after my first absolutely failed attempt to make muesli bars?
My kids like muesli bars a lot, but I don’t want to buy them any longer, because with all the sugar the bought ones are more like candy than a healthy snack.
So long,
Corinna
they look really good…although i do feel a little scared to attempt them haha
These look really good. I wish there was a way of imitating the pouch/squeezy yoghurts at home. Just yoghurt but for some reason much more appealing than when in a bowl with a spoon!
You might like to try squeezems reusable pouches available from Lime Tree Kids.
Thanks Kate, you have inspired me to try again with homemade. I’d had the same failures as you but had given up. Thank you for perservering!
Ahh, thanks for sharing. I have been trying to master the muesli bar too as they are just too darned expensive to buy or full of nuts/sugar or other inappropriate things! I will be giving this one a go.
These looks delicious Kate. I’m going to give them a go tomorrow.
Oohhh, thanks Kate. I will try these out. I gave up trying to make muesli bars long, long ago. They look great for lunch boxes. :)
Oh wow! We’ll be trying these here too! I’ve tried before and had the disastrous crumbly variety! Still tasty but not so easy to eat! These look fabulous! :) Thanks for sharing!
I’ve just picked muesli bars up off the floor – the ones the kids hassled me for endlessly last week, packed in their lunch boxes, then brought home and threw in the general direction of the cupboard. I’m hoping that if I get them making these, they’ll take more care, and make more effort to eat them. Of course, we have to go for the sprinkles-on-top to achieve that! Thanks!
Thank you so much for this recipe! I, like many others, have been trying to “master” the museli bar for ages. My kids love them but I really hate buying them at the grocery store because of the price and all the extra, not so good for you, stuff that they have in them! I will be trying this recipe this weekend and cannot wait to see and taste my final result! Thanks again!
I was seriously thinking about going commercial again after so many failed attempts at the humble muesli bar. I’m off to go make this one right now! Thank you!
Tried these today – so easy with all your instructions! Worked really well – keen to try new combinations now.
I made these this morning Kate. They are quick, easy and so tasty. Thanks for the recipe and something new for the lunchbox. :)
This is almost identical to my recipe! I use 1 cup coconut and 1/4 cup of sesame seeds too. NOM!
How do you think these would hold up in the freezer?
hmmm I’m not sure.
We keep ours in the fridge so they don’t get warm and sticky and they come our rock hard but fine. There is not much moisture in them so I’d at least have a go with some in the freezer and see. A batch never lasts long enough for me to try it!
Made these today for the first time and they are just delicious! Mine turned out a bit too soft though, so does that mean I didn’t cook the syrup for long enough or I cooked it too long? TIA
If they are too soft then you may need to cook your syrup for a little longer, and make sure you push the mixture down really well into the tin/container. I use the back of a big metal spoon and spend quite a while pushing it down then running the spoon over the surface to get it packed down really firmly.
Hi there, is there a substitute for the malt extract/syrup?
Just leave it out if you can’t get malt extract… or add a dollop more of honey or even maple syrup if you like. It just adds extra flavour but it’s not essential.
Haha, should have read all of the instructions before I started. Busy, tired working mum of four, threw in all the dry ingredients including the sugar, so couldn’t make the syrup. Ended up resorting to melting together honey and butter, adding to dry ingredients – too dry wouldn’t combine, so added an egg. Have popped them in the oven so fingers crossed that they can still be used for the lunchboxes!
These look YUM! Putting them on my to try list :)
Thanks, how long will these keep for?
They should keep for more than a week in a sealed container in the fridge, depending on what additions you put in them.